Hello everyone,
I am finally able to provide with an update for the current projects.
I must say, I have been working on a remodel of the 787 due a several number of reasons which I would like to point out.
I would like to do as before and offer this “update” to those who already purchased the set (the set with galleys and/or cargo holds), again shipping costs aside, I may charge a bit for the new raw materials as this is not only the fuselage that is being offered. This will be offered after the third batch release, so that I can keep up with the material costs.
This was not something planned, but something that came to mind to try to improve the experience for the modeler as well as improve the production process.
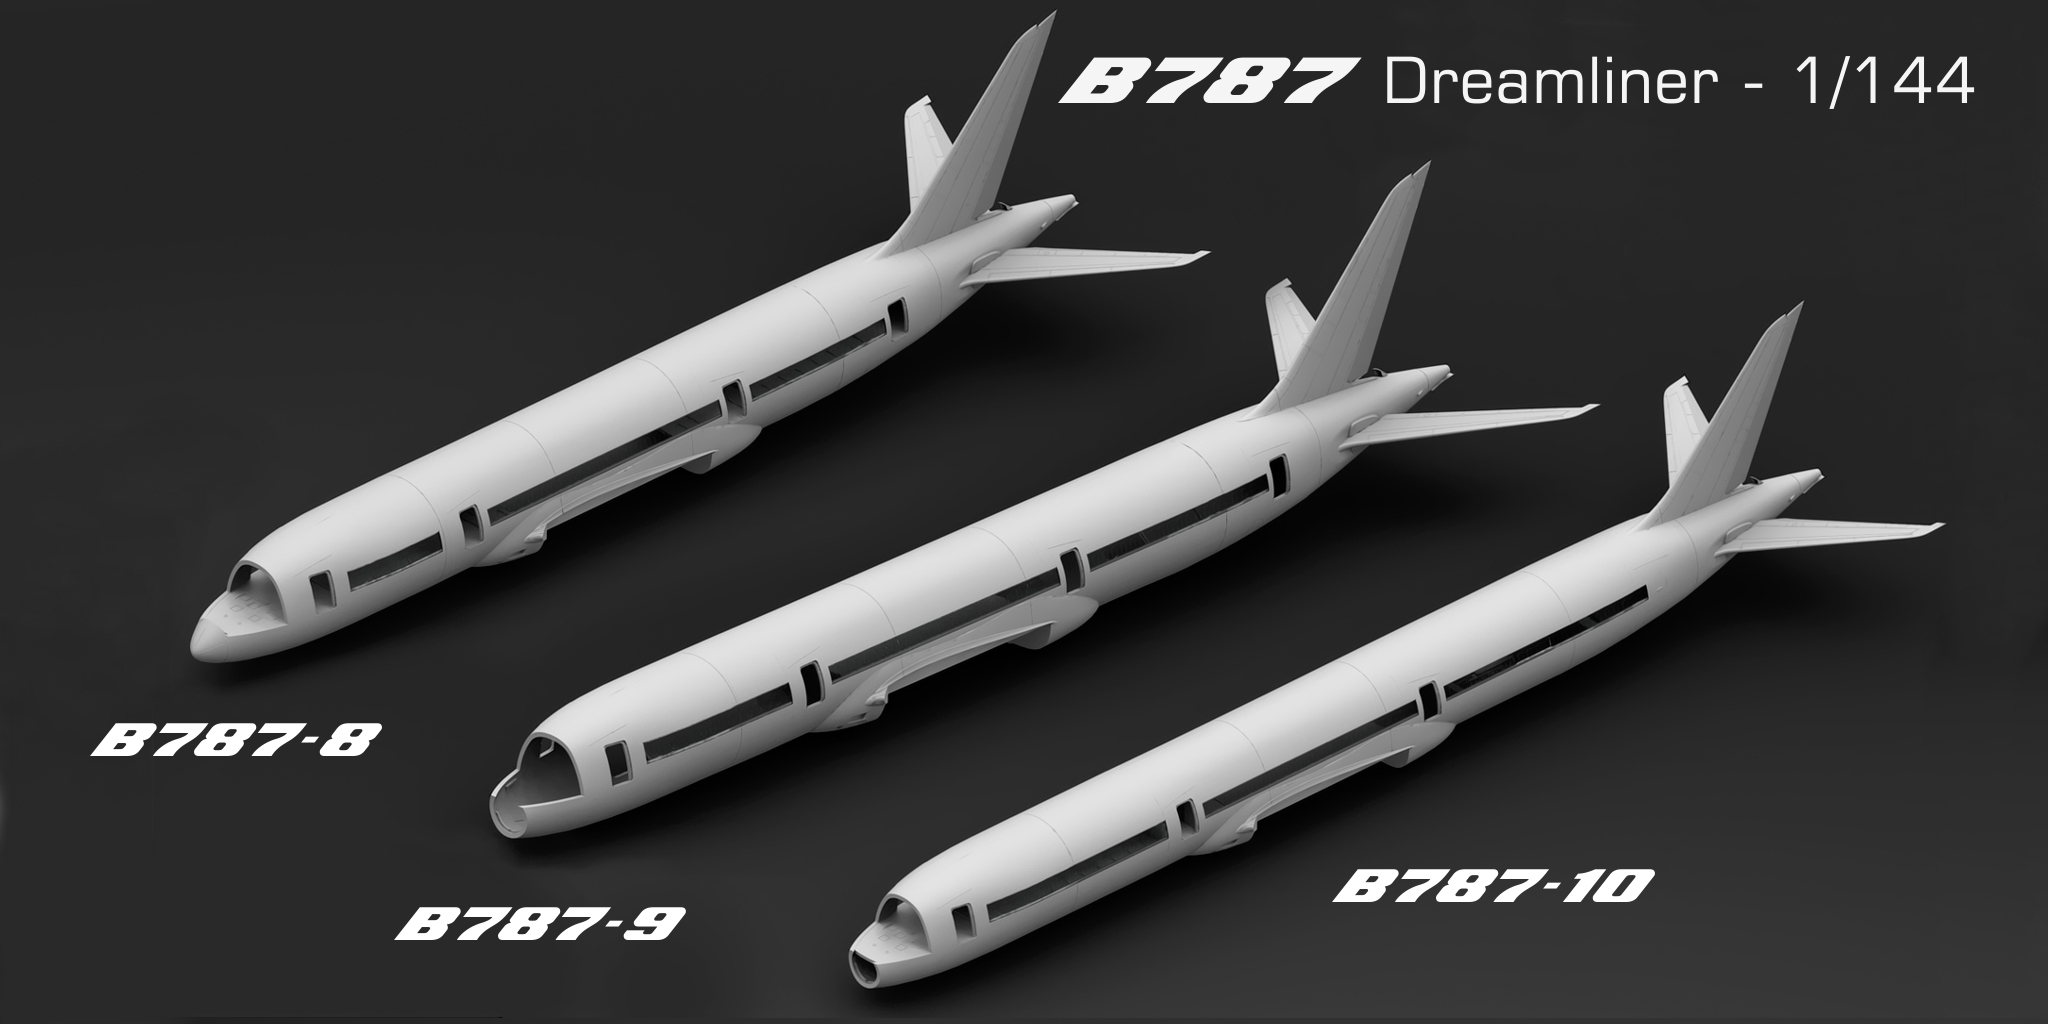
- First and foremost, the fuselage; this received a major update in the sense that now each individual version has its own fuselage, so no extensions are needed.
I am aware from the second batch, that not everyone uses all the galleys, so to use the door plugs, a cut had to be done. This is something that is already solved in the new fuselages where a plug can be installed for either the closed or the open door on the pre cut door holes.
This decision was made because I am aware not many people may like to cut areas, there is also the added difficulty to make the precise cuts and the new molds will last longer by casting the fuselage this way.
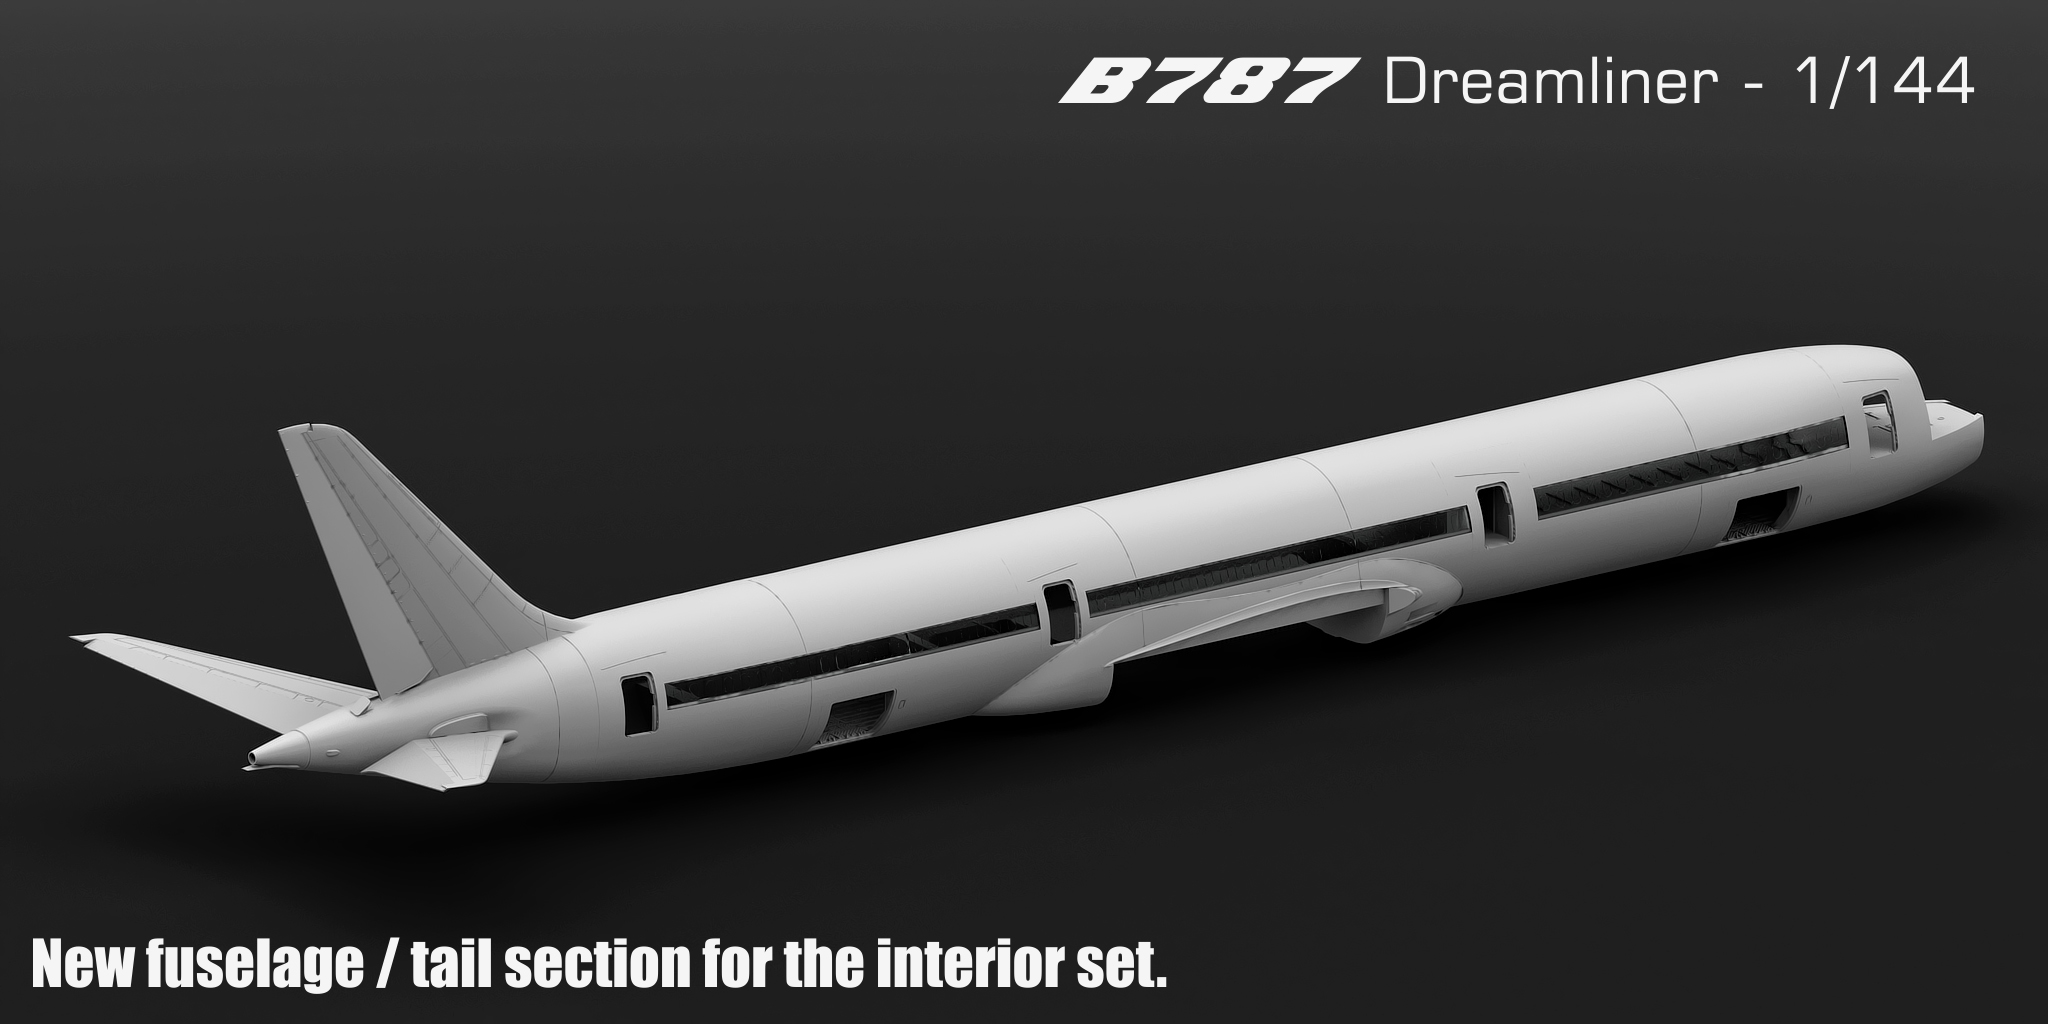
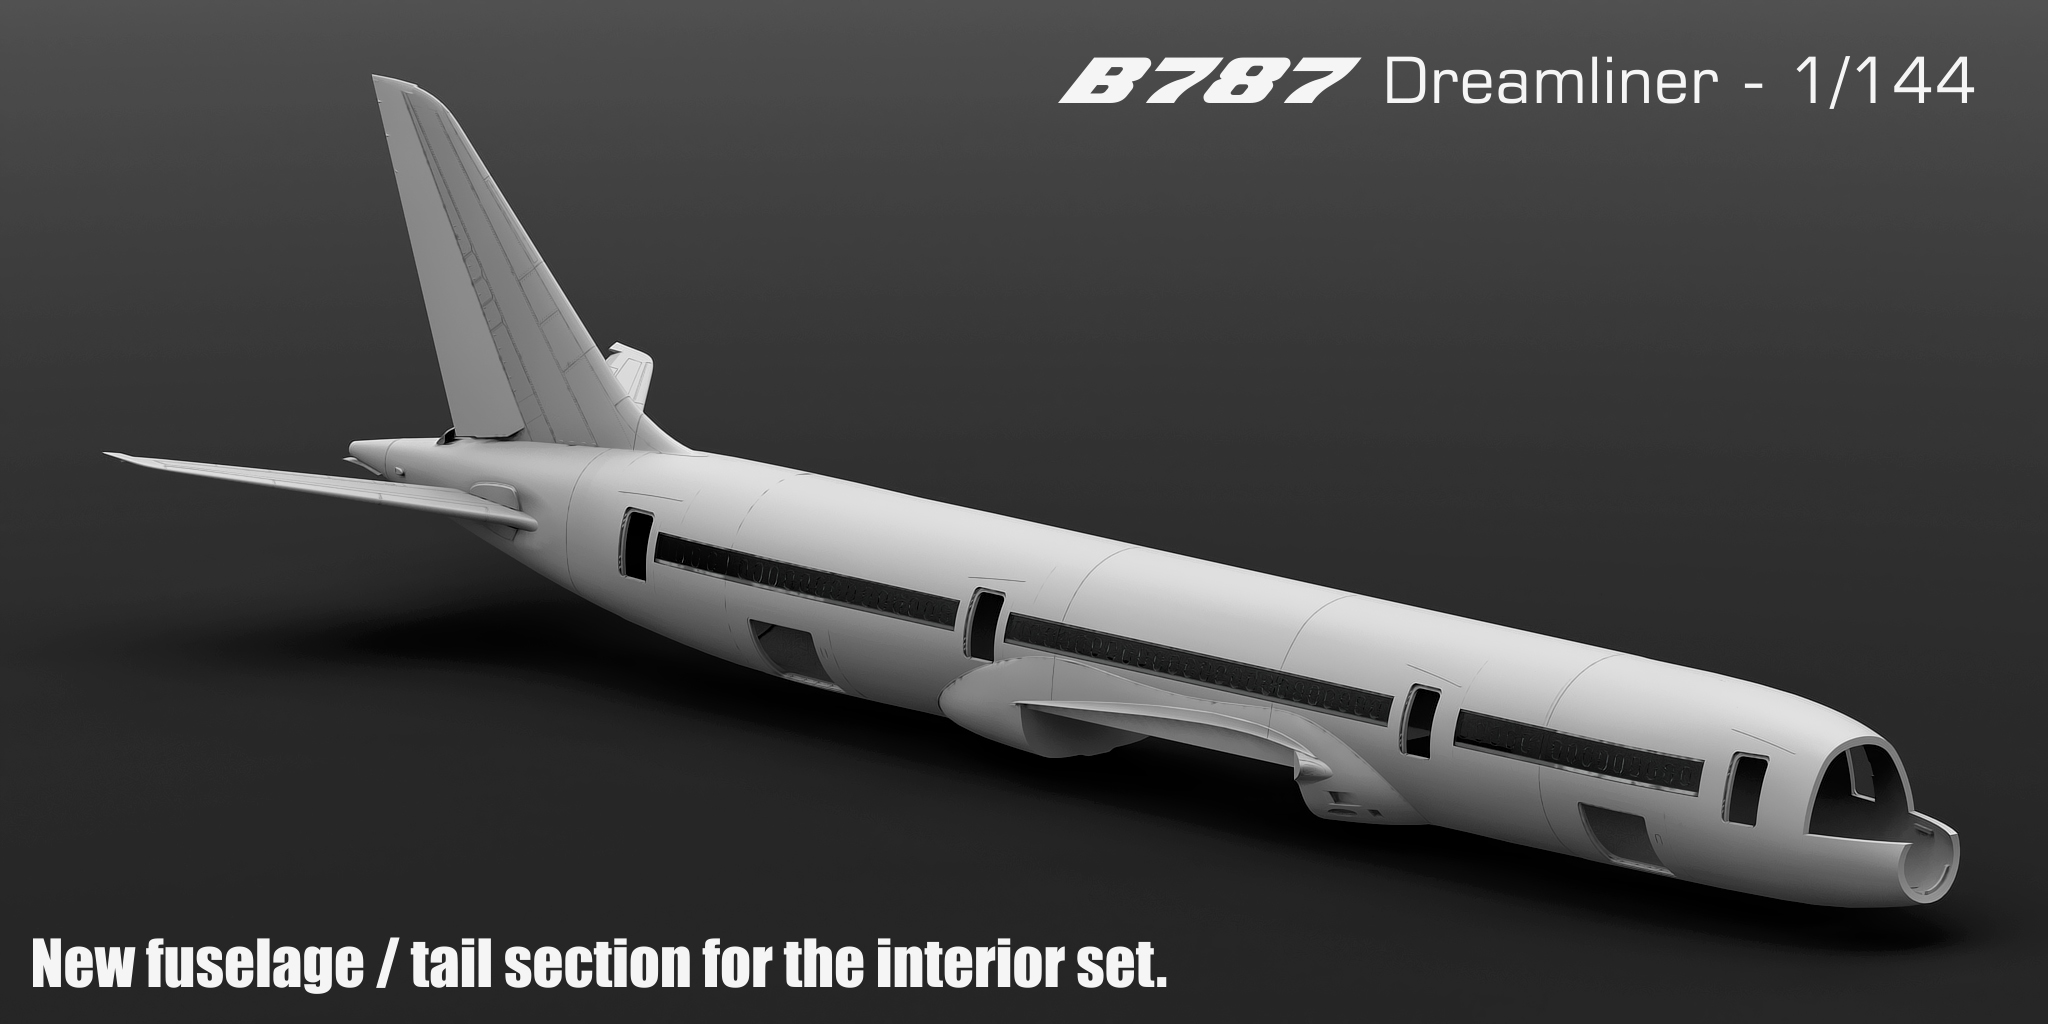
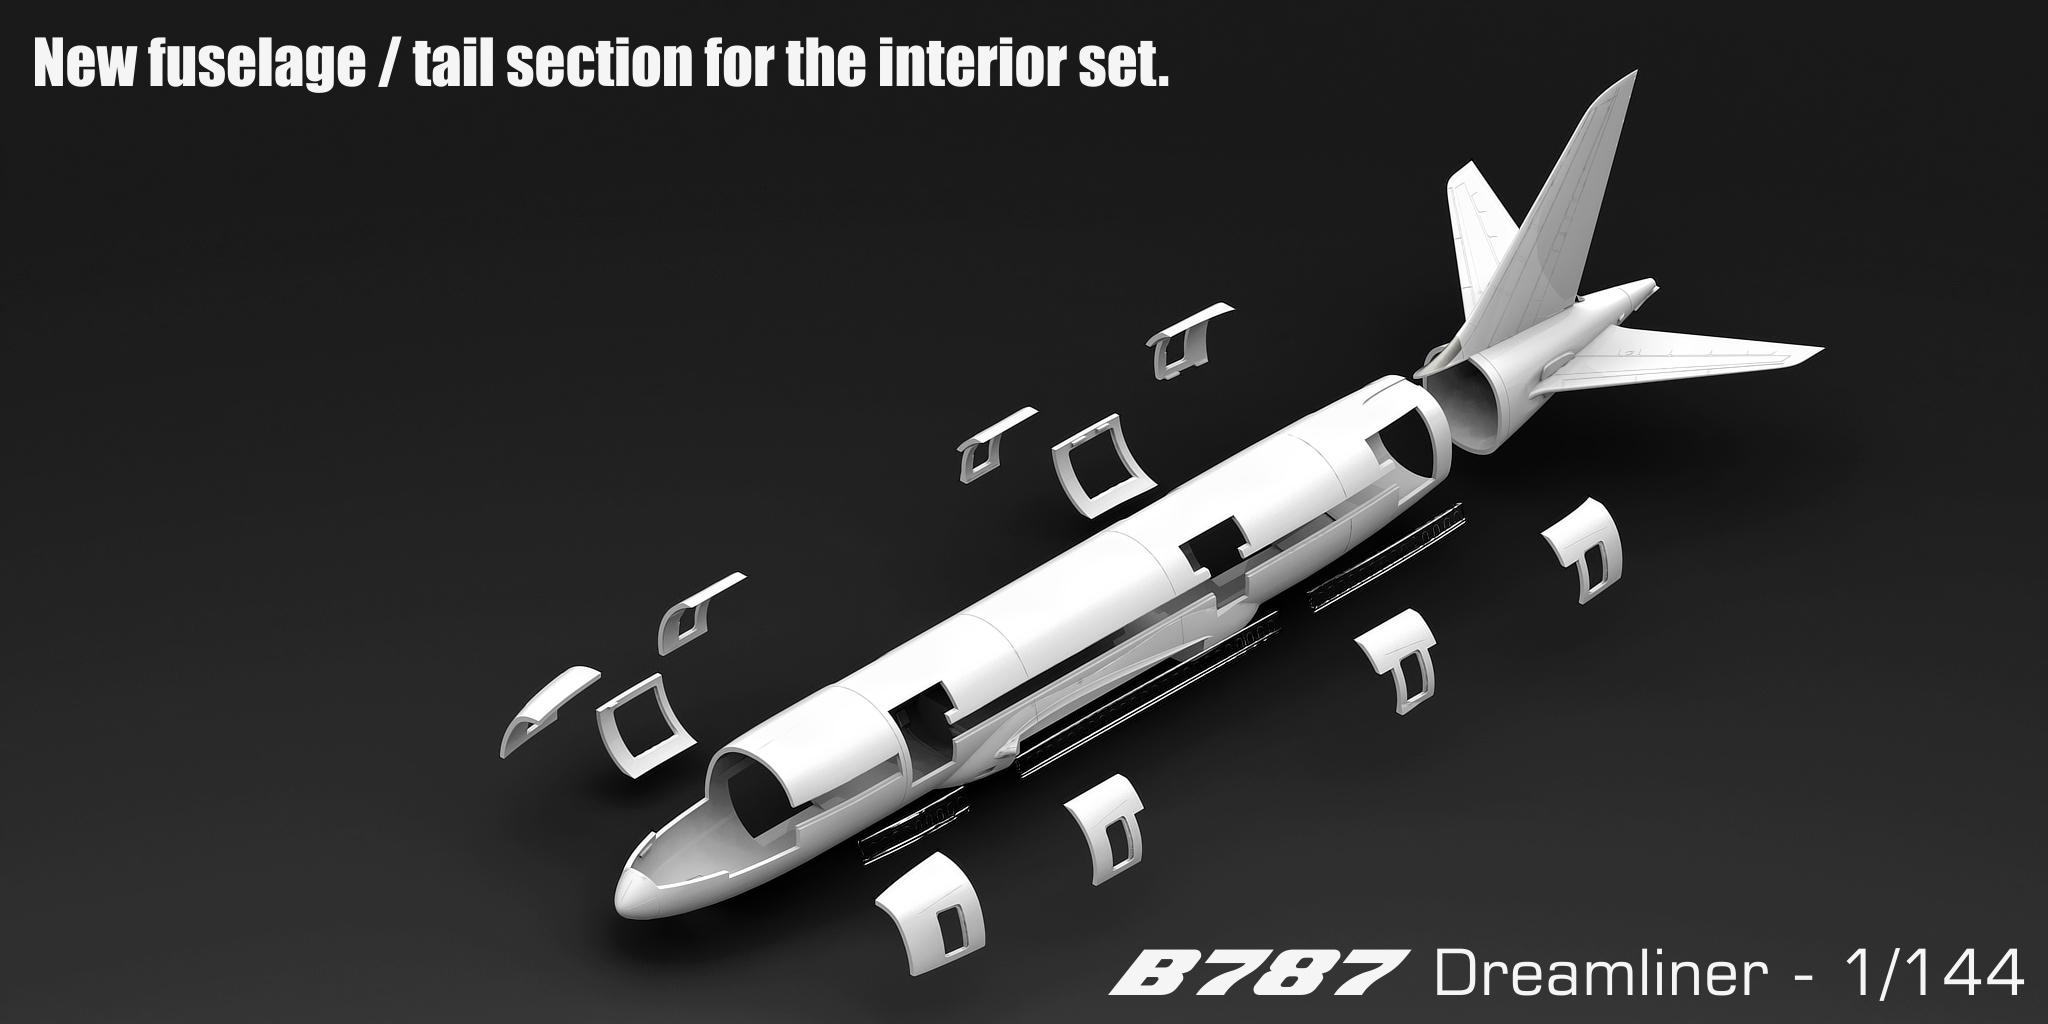
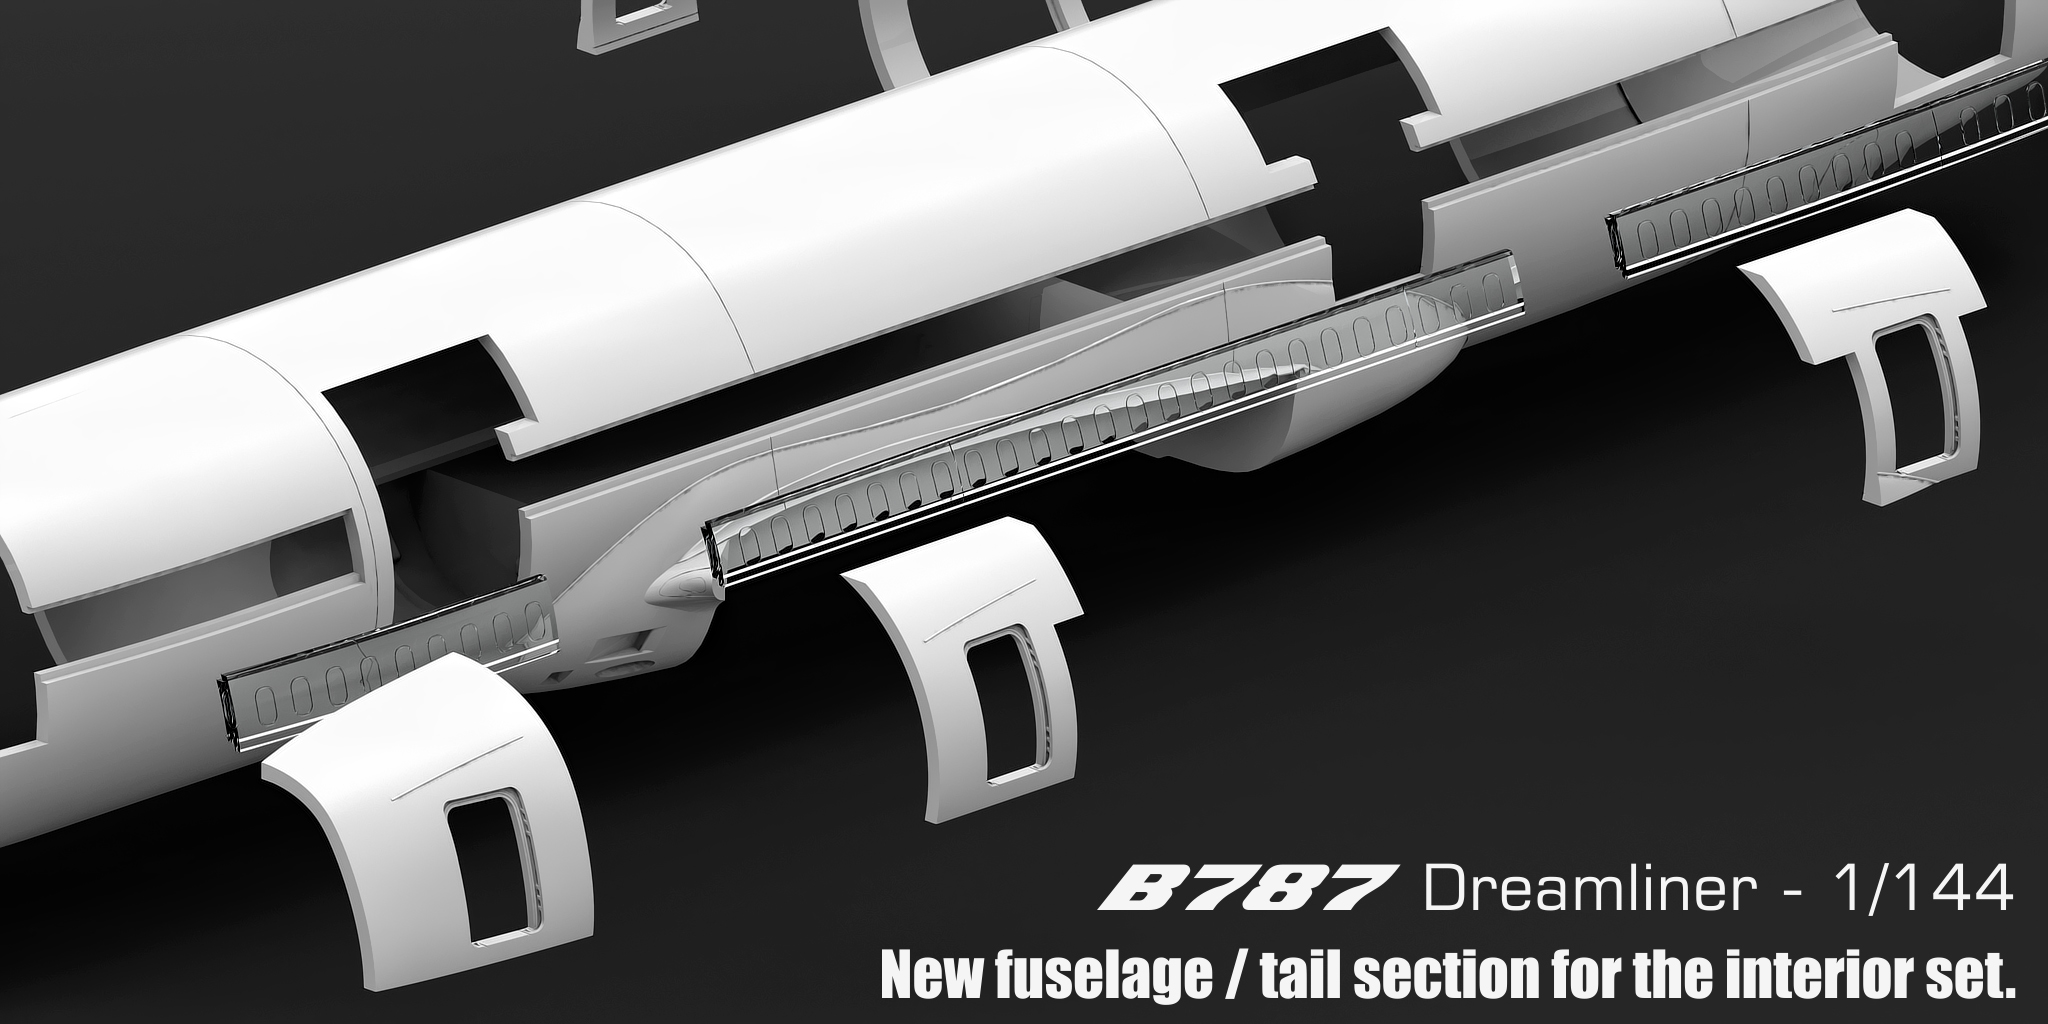
This door frame plugs idea is something that I already tried a long time ago when using the Revell’s fuselage, but at that time it was very difficult to make the cuts exactly the same on both fuselage halves, resulting in uneven floor level. Now this is solved because the opening is already done on both fuselages.
I tried to give some clearance around the door frames and rain gutters, so that the putty work to cover the union can be done at a safe distance from those details.
- Windows:
The windows are something that is always a debate amongst modelers, “shall I use the clear part? Or shall I use window decals?”. Well, seeing how Zvezda changed the windows from their -8 kit to the -9 kit, I wanted to do something so that the modeler did not need to worry about adjusting the hole window rows and gluing the transparent parts through the inside, besides, the -10 version has more windows that could not be used from a single -8 or -9 kit.
My idea for this was to use a row of windows that will be casted in clear resin, paying a special attention to thicknesses and adding a slight (very gentle) extrusion for the window frames. This new remodel will include painting masks, I would like to add masks to cover the window and masks to cover outside around the window frame, so that these can be painted in a metallic finish.
If window decals are your preference, there is no need anymore to close the window holes.
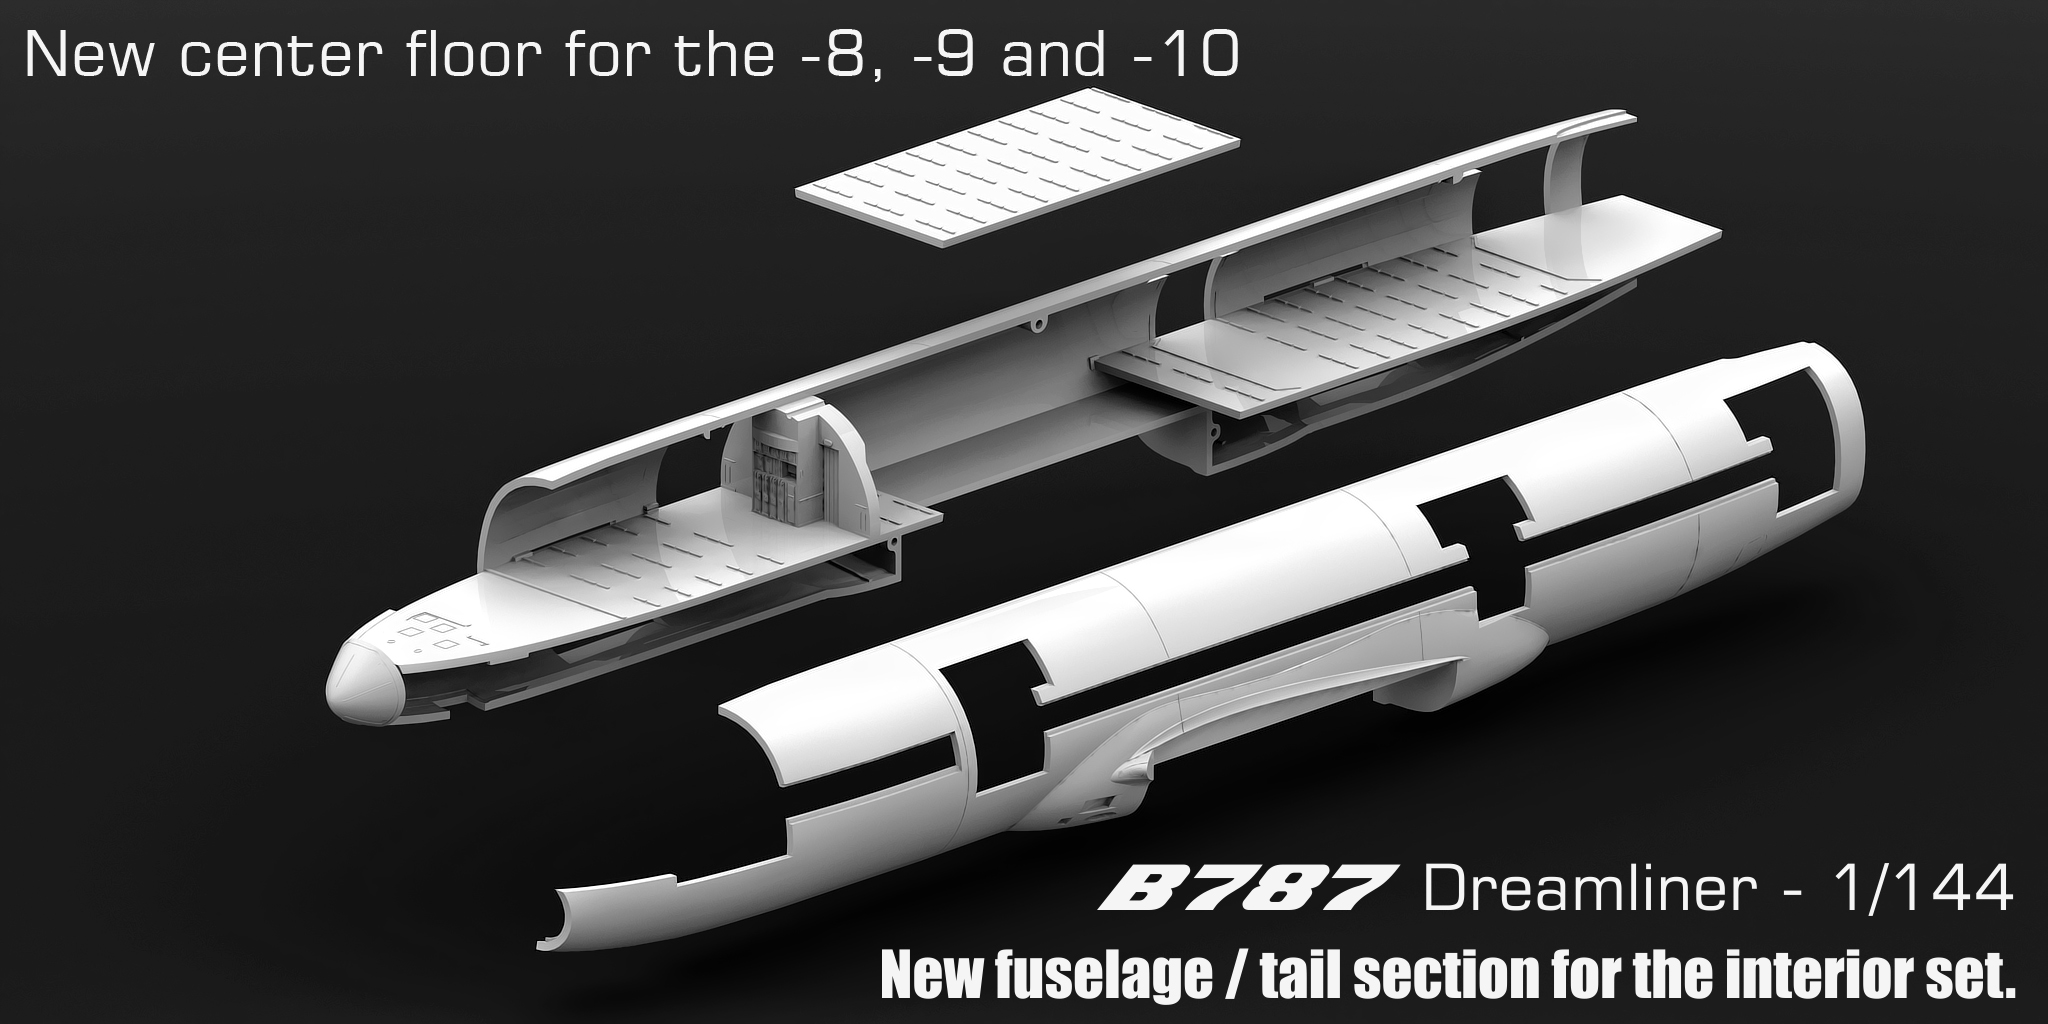
A new center floor is also created, so to give the possibility to the customer to add extra seats.
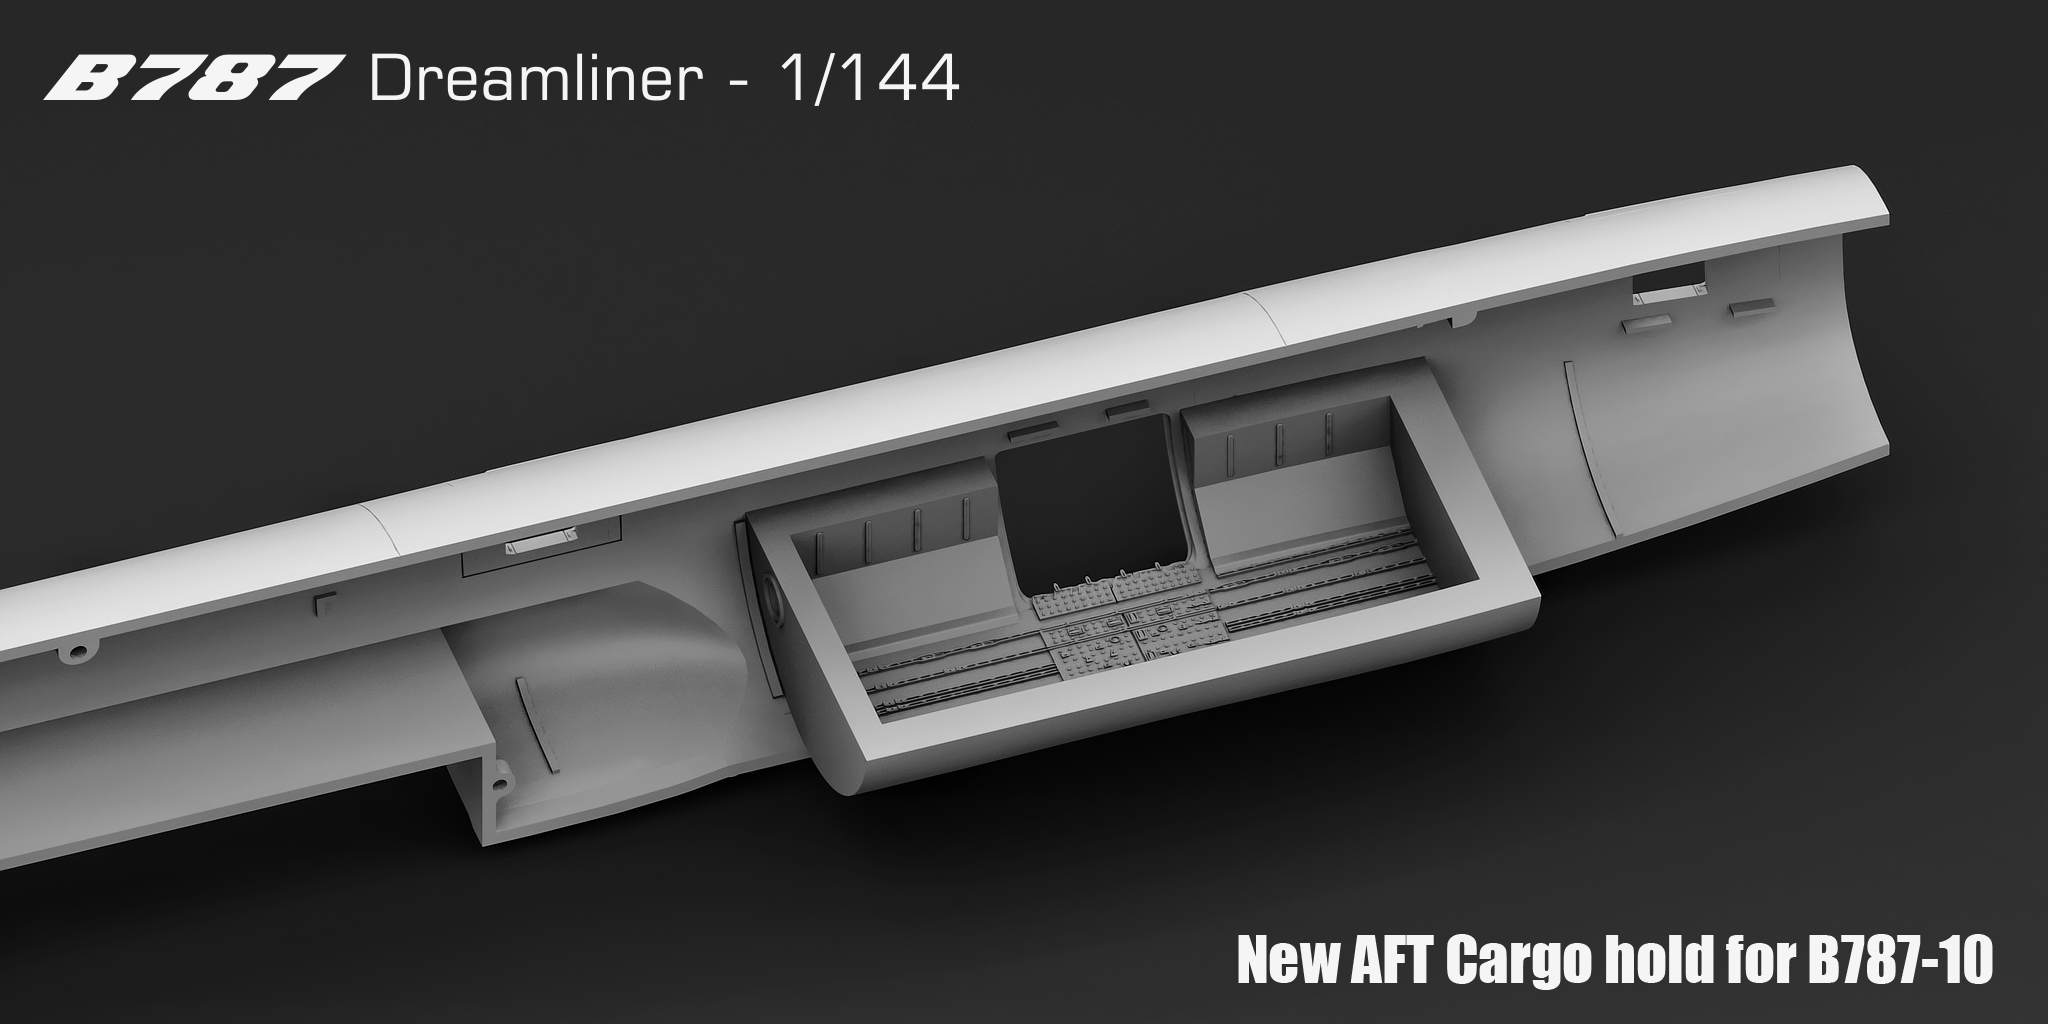
The B787-10 variant required a new AFT cargo hold. While the FWD cargo hold moved forward algonside its section, the AFT door stayed at the same STA, I am guessing to avoid tail tipping problems, so with the new longer shape, a flatter cargo hold that could adapt to the new fuselage was made.
- The tail section:
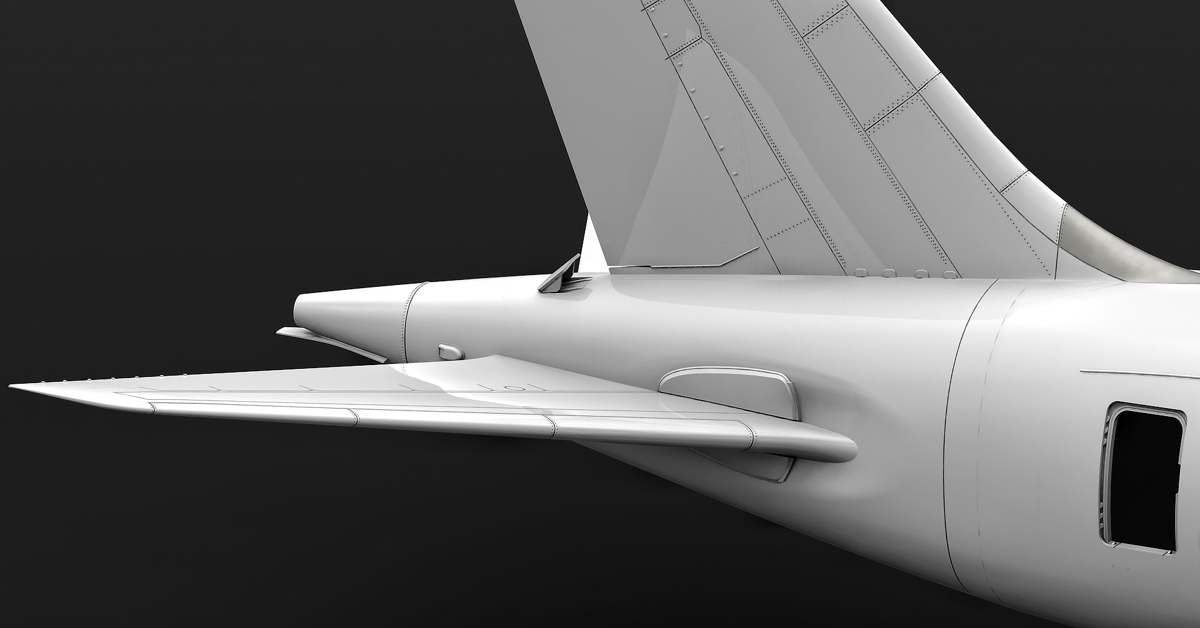
A big change of this set is the tail section, what pushed me to do this modification are two things; one, making things easier for the modeler, not needing to cut the tail from the original kit and then positioning it on the fuselage, the new tail has as much detail as I could add and a dedicated gap to position it on the new fuselage. The tail cone is also a separate piece which is going to be a single part.
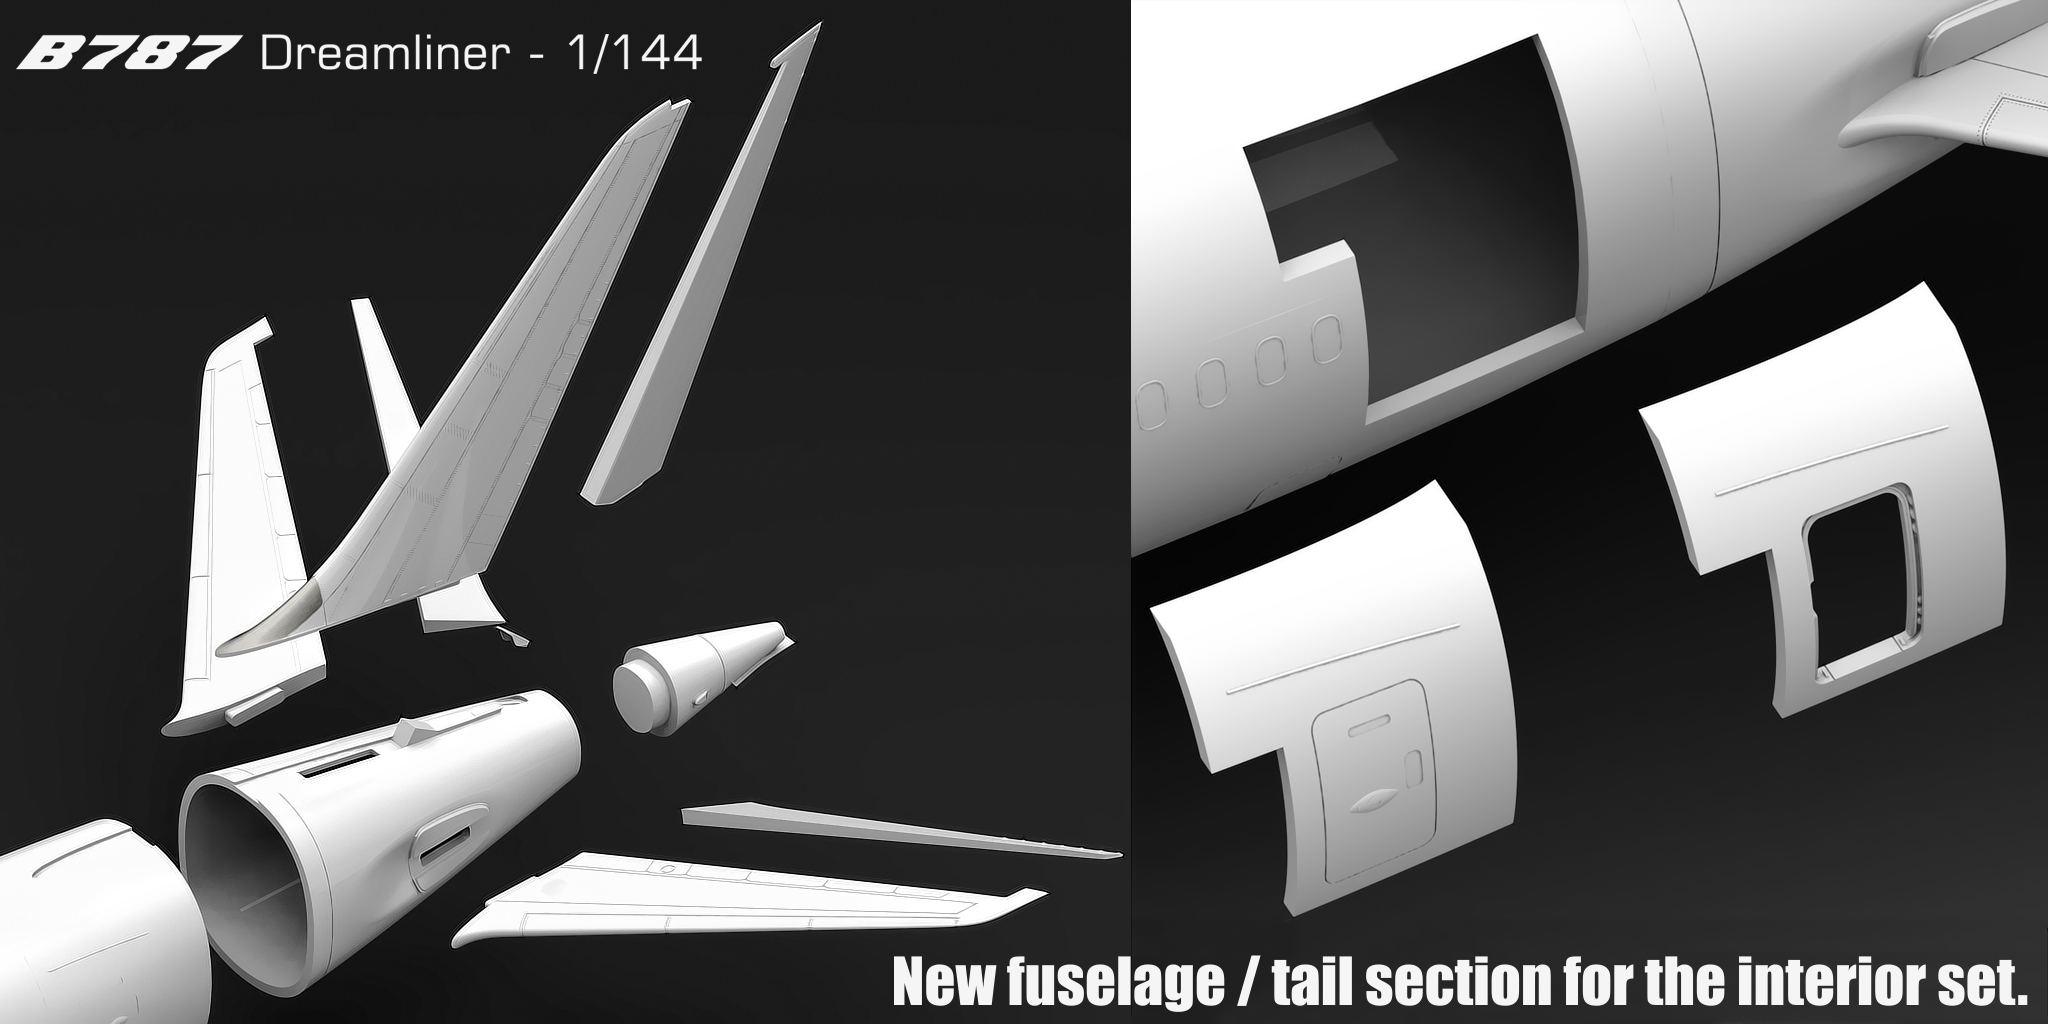
The other matter that made me want to redo the tail section and making the horizontal stabilizers was to add the detail at their base, which is non existant on the model kits. By wanting to add this detail, I had not other choice but to make new horizontal stabilizers, for which two elevator options are included, with and without the hydraulic power on, the same can be said about the rudder.
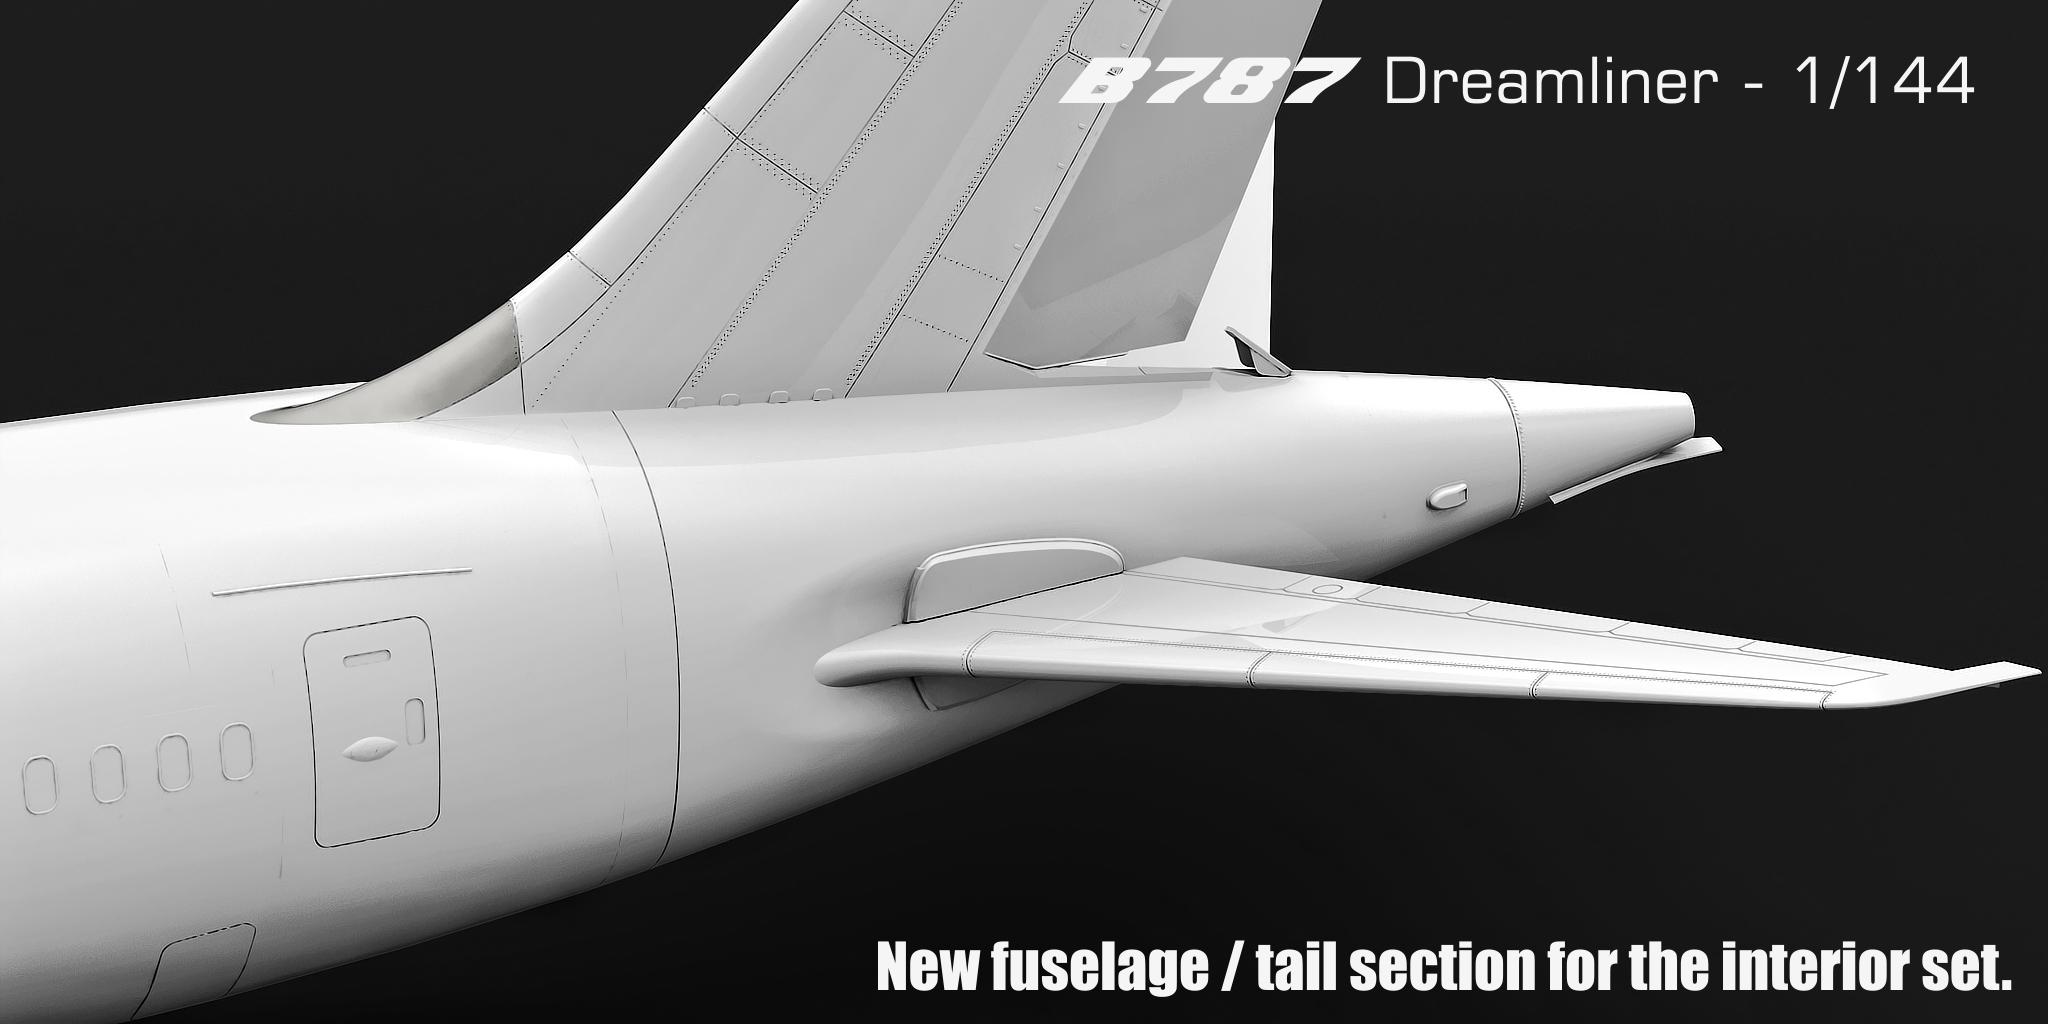
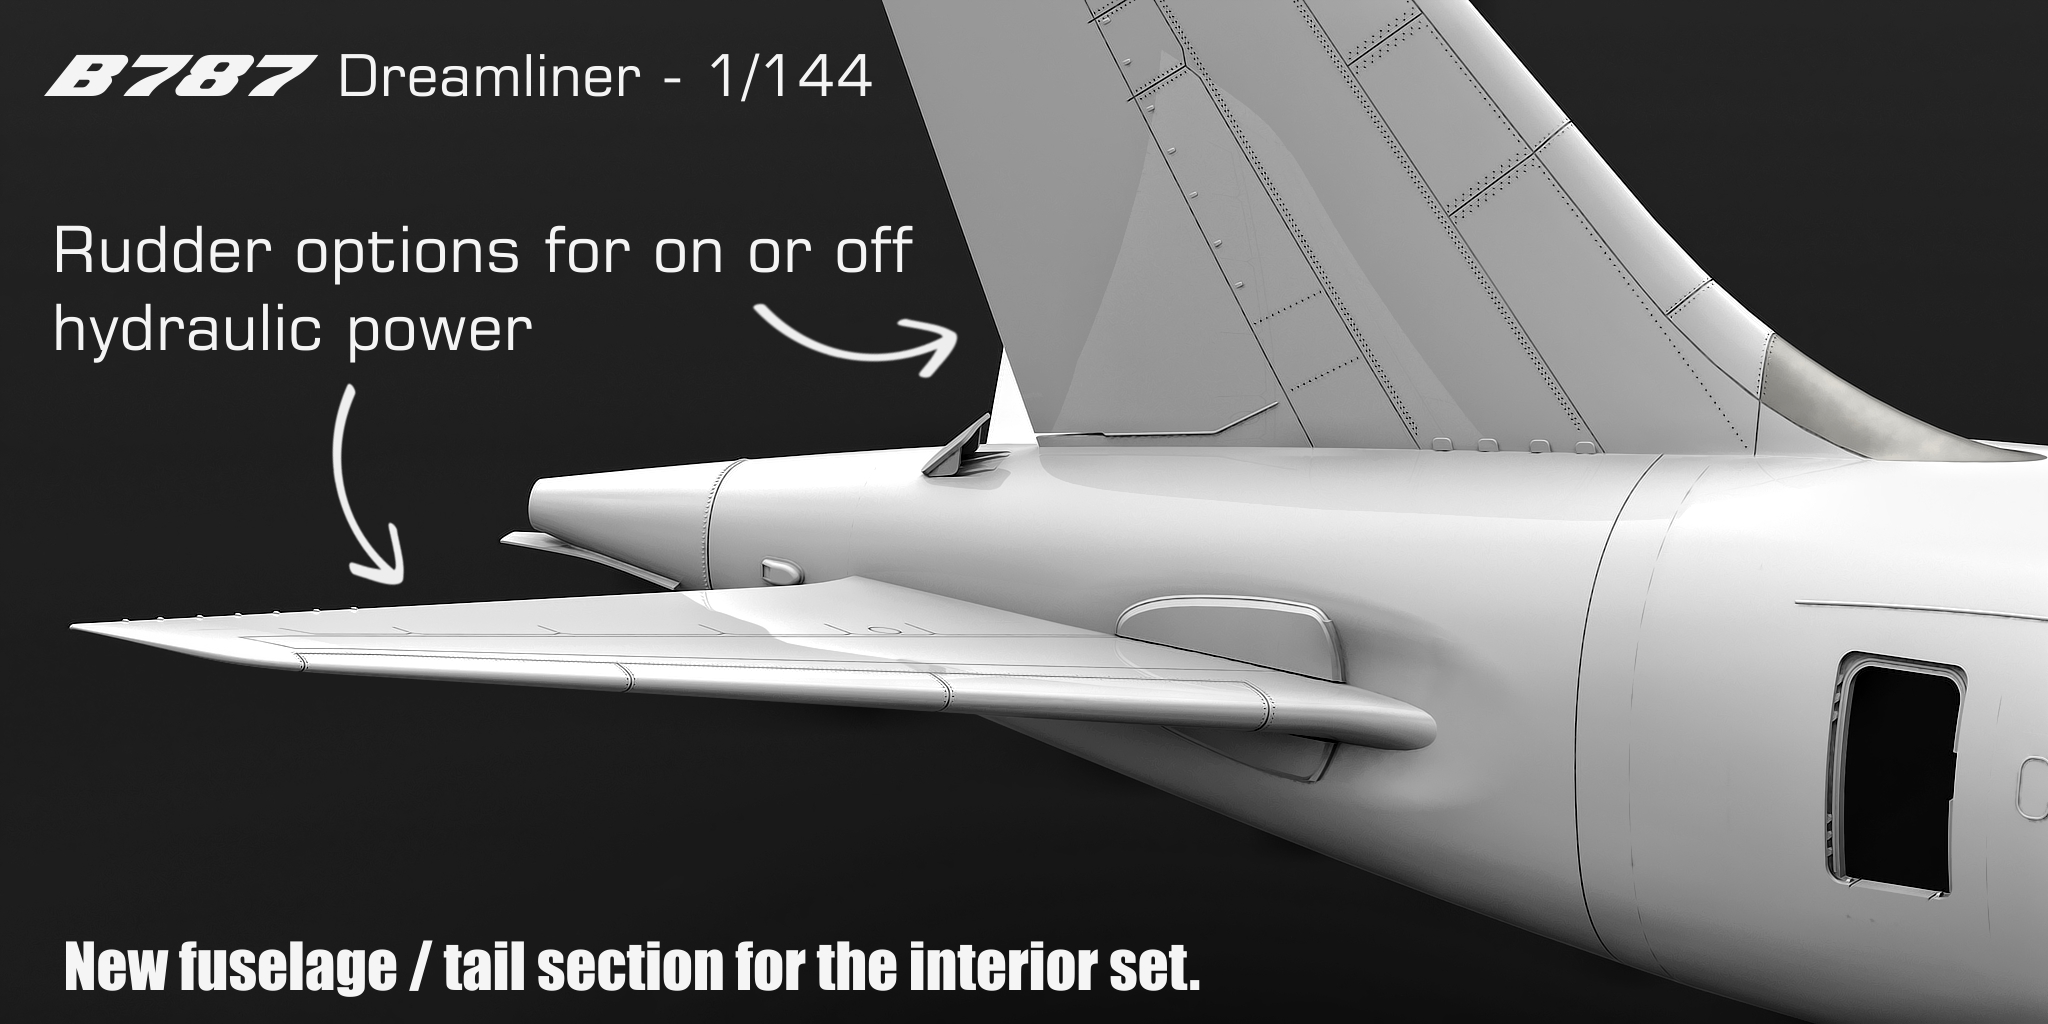
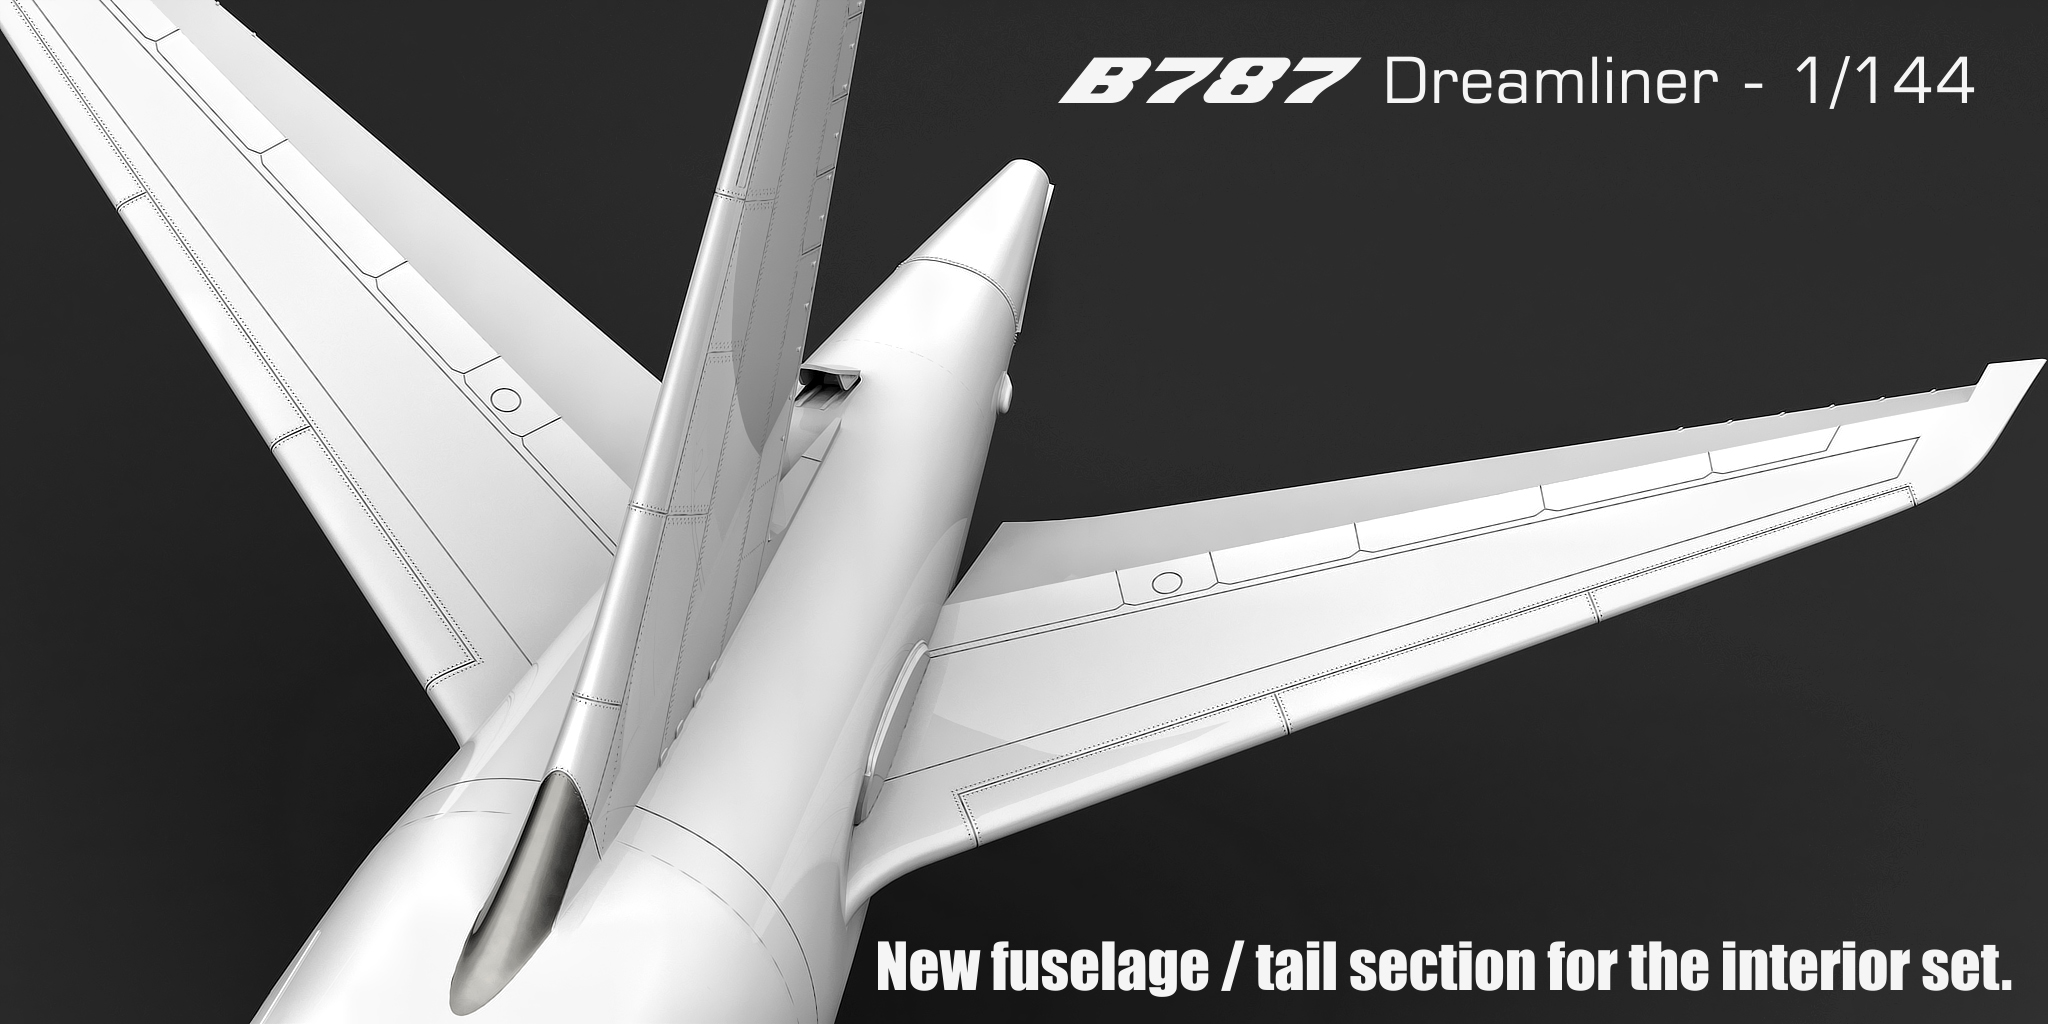
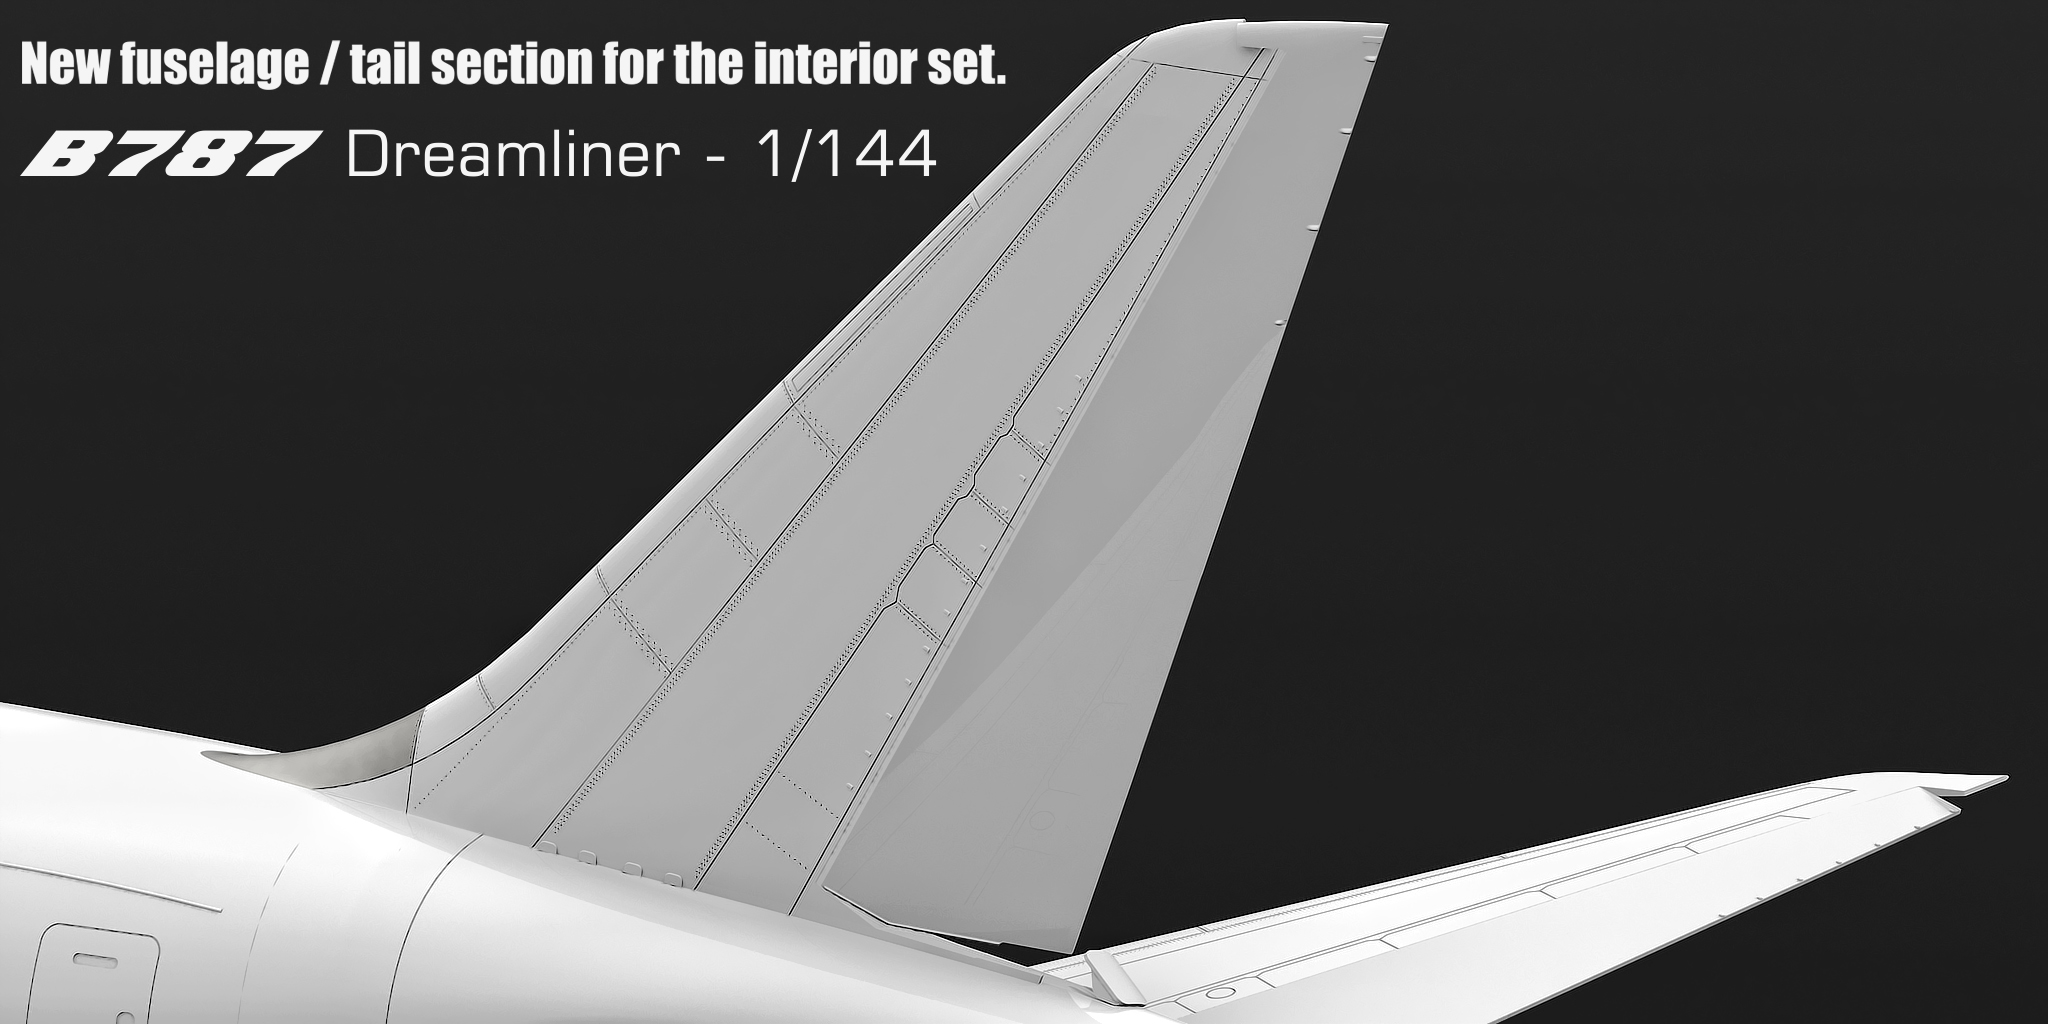
The reason why I include two types of rudder and elevators is because one does not take the “straight” rudder and glue it at an angle, but the angled versions already have a flat face that fits on the tail / stabilizers.
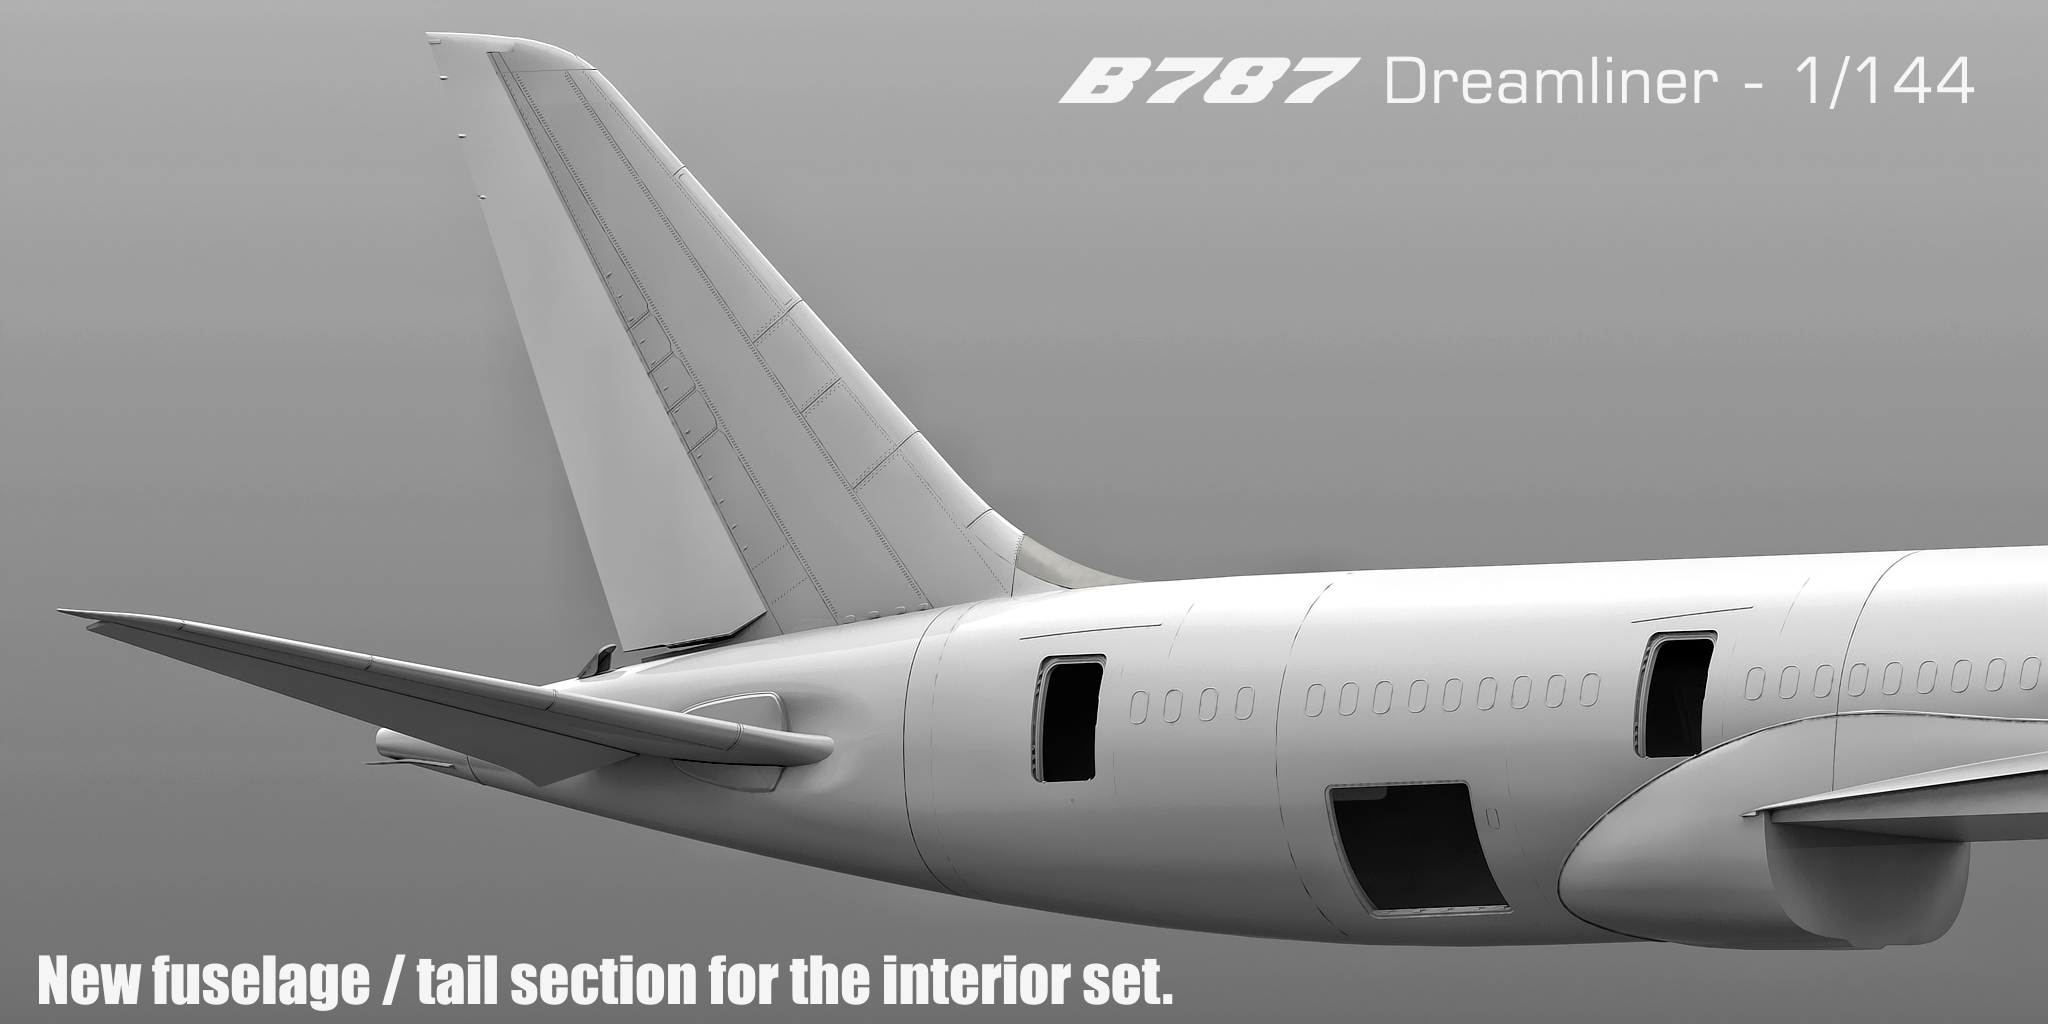
I hope these new improvements are going to be that, improvements that can benefit the modeler in the building process and having a model with a more detailed representation.
I am learning a lot and ultimately, I want to do my job right and use all the knowledge I gather from the get go, which is why this 787 has gone through all those modifications.
This is all 3D work at the moment, but I am going to do a real test for which I will also try to improve the printing of the master parts for the fuselages. I am sorry that I could not provide with such detail and improvements from the beginning, a lot had to do with learning on both, 3D modeling and actual modeling, working with the model gave me ideas that I implemented, but I wish this could have been done from the start and for this I apologize, again, I am offering this to those who already bought the set as I mentioned in the beginning.
B747 project:
Everything that I learned with the 787 is going to be transferred onto the 747, sadly, in this case, a lot more is going on with the 747.
I know that this may angry some who are waiting for this set, but I took the very important decision to remodel the fuselage. As you know, by remodeling the fuselage, basically everything else will also need to be remodeled, while I may still try to use some details used on the main deck and cockpit. Again, there are some points as of why I took this decision:
- New photo references: I was able to find new photo references of the hump which will allow me to make a better representation of it, having learned from the first version (V1 from now on) and from the 787, I will be dedicating the ammount of time needed to do a better representation of the overall shape.
- 747-400F, 747BDSF and 747-8F: I have started making the -8 model, the best would have been start with the -400 because modeling wise, it is easier to make the fuselage longer than making it shorter, therefore, I will begin this remodel by working on the -400 fuselage with both, long and short humps.
- Lighting: I went from different methods for lighting the interior, the current fuselage was finally designed to use optic fiber cable, but in the end the lighting solution wasn’t the best and the work done inside the fuselage was already impossible to adapt to a newer lighting method, so I will go back to the initial design of one small LED per light position, but this time connecting them to a copper tape that will run through the fuselage, so the wires won’t need to pass through the cargo holds.
- Wings attachment: The project started to be used with the Revell kit, both Revell and Zvezda have different wing fittings, this means that I cannot go back and remodel the wingroot to fit the Zvezda wings without making a new wingroot, therefore once the main V2 fuselage is done, a specific wingroot for each manufacturer will be done.
This will be the most complex part of the project, and I am still considering making my own wings for the sake of having a common fitting, this is also because the -400 wings are different and I will probably end up making them anyway for a “trans-kit” although what I will explain below will be my choice.
Final thoughts: As I am making this project to be used with the Revell/Zvezda 8i / 8F models, I may end up making a full kit for the -400, -400F and -400BDSF versions. Revell’s old 747-400 kit could use a lot of improvements so much so that perhaps it is just better to make a full new kit, and when I say new kit, I also mean with galleys/holds. My objective would be to make the models as detailed as possible, including the landing gears as well.
I am very fortunate to have the help a friend of mine which not only helps me with references but at the same time providing me with lots of inspiration, so it is in my mind to make a detailed 747-400/-400F / BDSF kit which I could also “port” to the 1/200 scale someday.
Times:
As for when I will release the new 787 remodel, my goal is Christmas 2024 but may go to early 2025, at this point although the design is done, the tests and production do take quite some time and there are no shortcuts there. Naturally with these changes, the instructions will also require changes as well, so there is a lot of work ahead of time.
Once I am in the “physical” stage with the 787, I will begin the 3D work of the 747 V2 version.
Thank you everyone for taking the time to read and hope these new improvements/objectives will be something taken with positivity.
Best wishes,
Guillem


