


Hello everyone,
It has been quite a while since my last update, I wanted to take a couple weeks off trying to improve my workplace health and production-wise.
You may not know this, but when you are 3D printing and basically using several types of chemicals for the various parts, you need to take extra precaution, it took me a while to realize how much I was exposed to it, so I wanted to take things more seriously.
I have been designing and making my own semi automatic cleaning station for a while now, it is finally built, however, I had lots of issues with the electric motors due several reasons, either delays in arriving and/or too little RPMs and missing parts. On my research, I have never seen anything built like this before, I wanted to create something hermetic while the printed parts are being cleaned, trying to be less exposed to the process, so a lot of ideas were collected from the experience gathered in the past.
I had to change things from my original design, from belt to rails and using a threaded rod similar to the method used for the opening and closing of the 747 nose door.
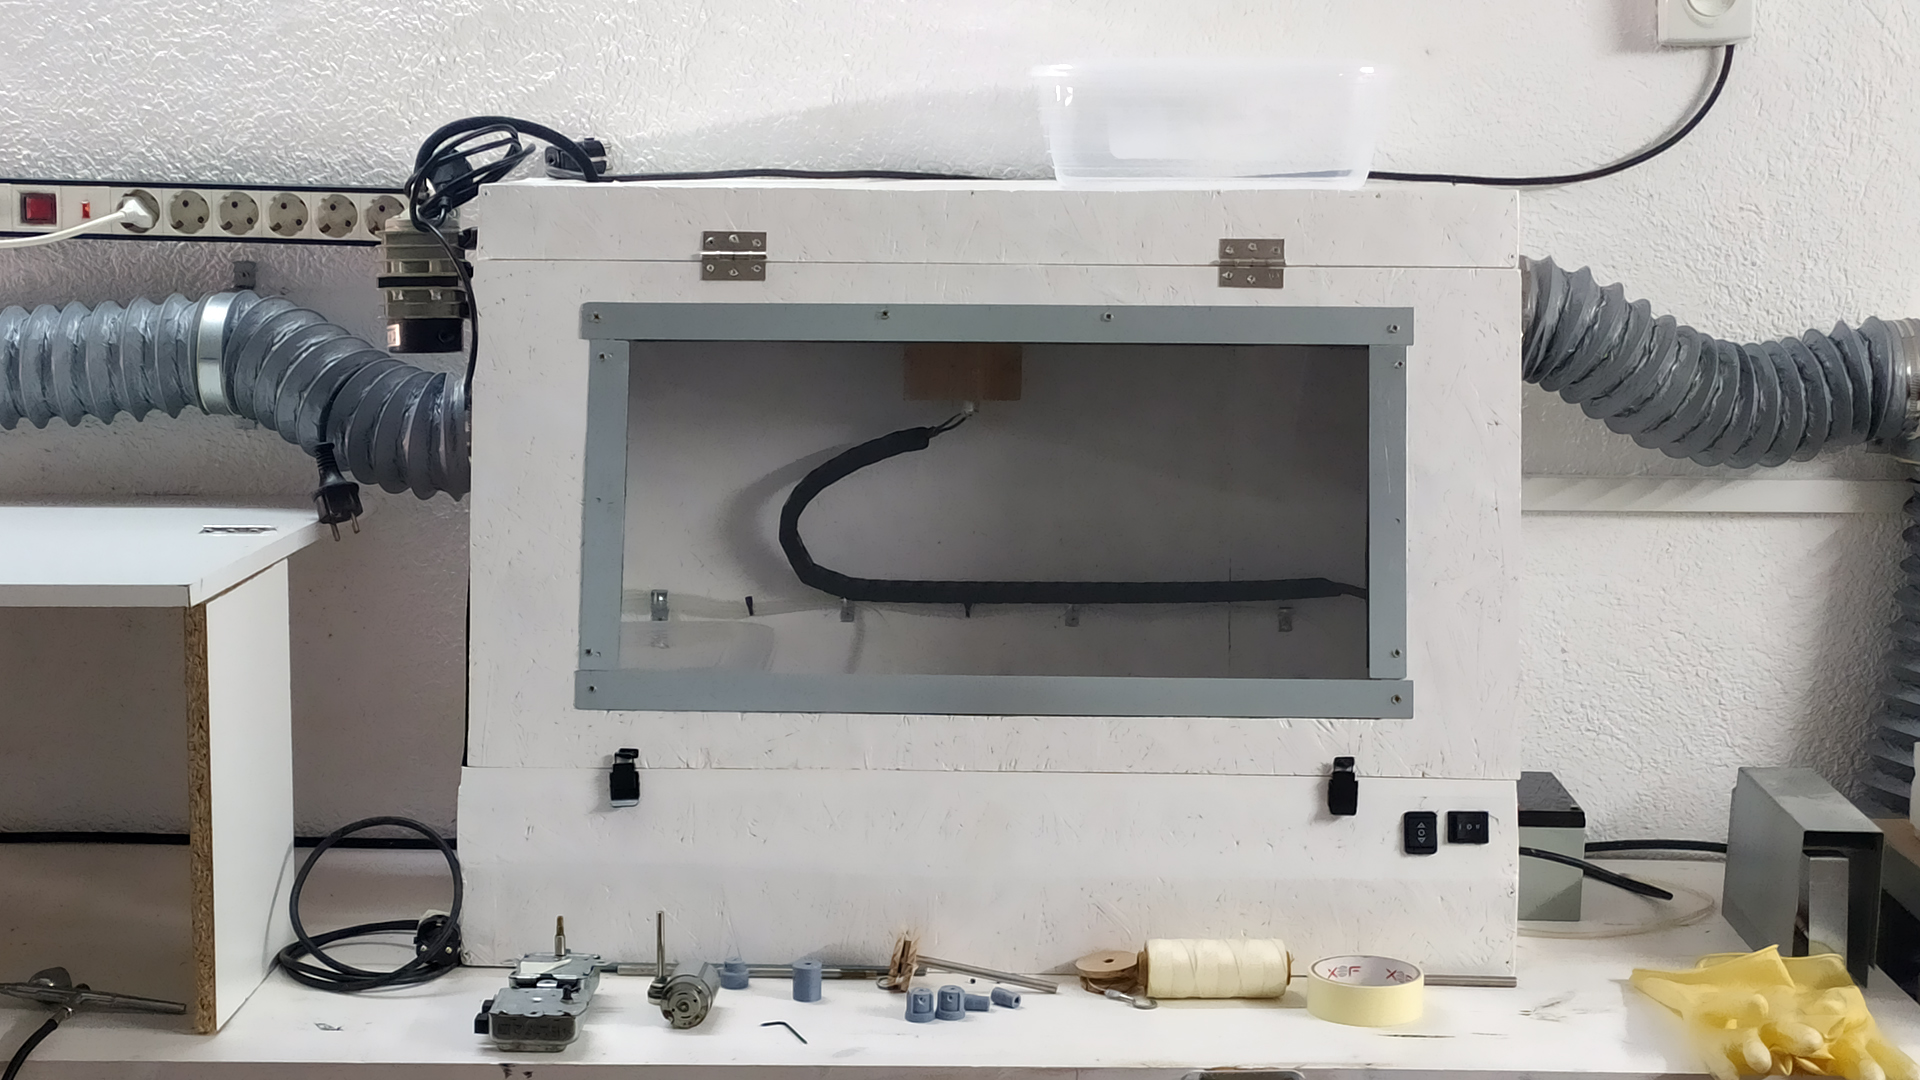
In the way of making things more “hermetic”, I made a fumes extractor circuit, connecting the printers, the cleaning station and even the trash can, so the fumes are taken out through the window and outside.
This also required me making a new cover for the printer. There was (and somehow still is) a tendency for companies to not use hinged doors, but rather acrylic covers that occupy an extra space when removing them every time. So I designed and made my own printer hinged cover which was also connected to the fumes extractor circuit.
Currently things are nearly finished, a packaging area was also designated and once the cleaning station is fully working, I will proceed to finish with the organizing stage, for which I also rearranged the corresponding shelfs.
1/12 B737NG Cabin:
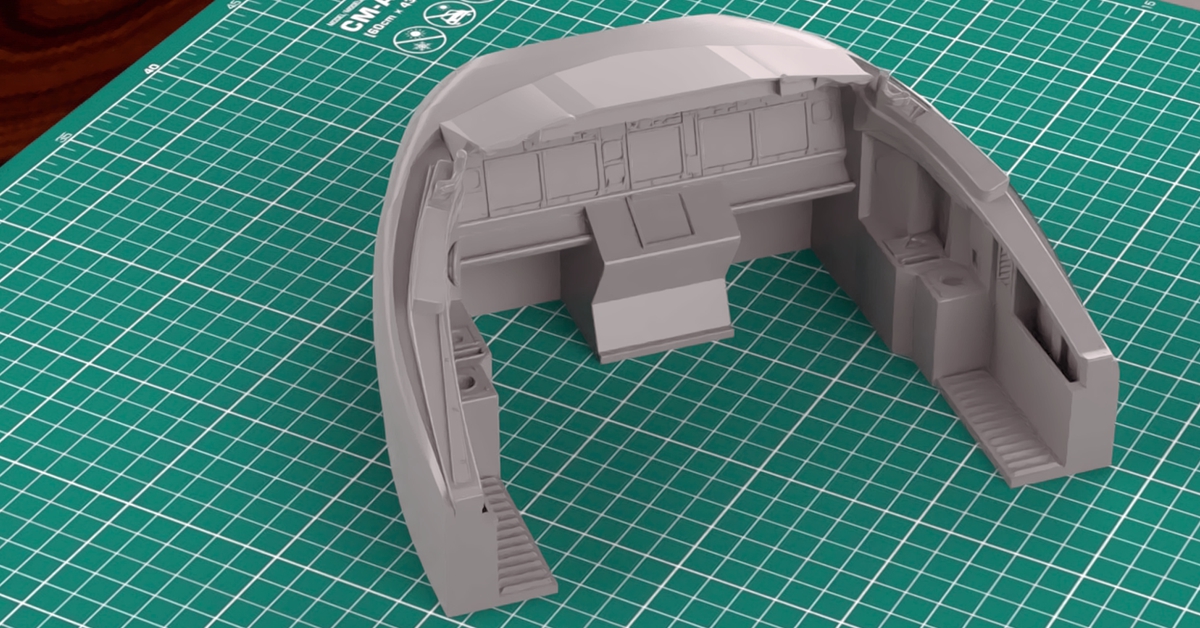
In the meanwhile I also tried to work on the ongoing projects, mainly focusing on the design stage for the 1/12 B737NG, having my workplace in that stage, computer work is what I was able to focus on.
I have been making the basic shapes, making the main panel, glareshield and sidewalls. At the moment I am considering how much I want to enclose the cabin, I am more leaned towards not adding the windows/frames because I would like for the panels/cockpit to be seen straight away, there is not going to be empty areas anyway as I still need to add the rudder pedals, thrust, fire and radio pedestals as well as the yokes and seats.
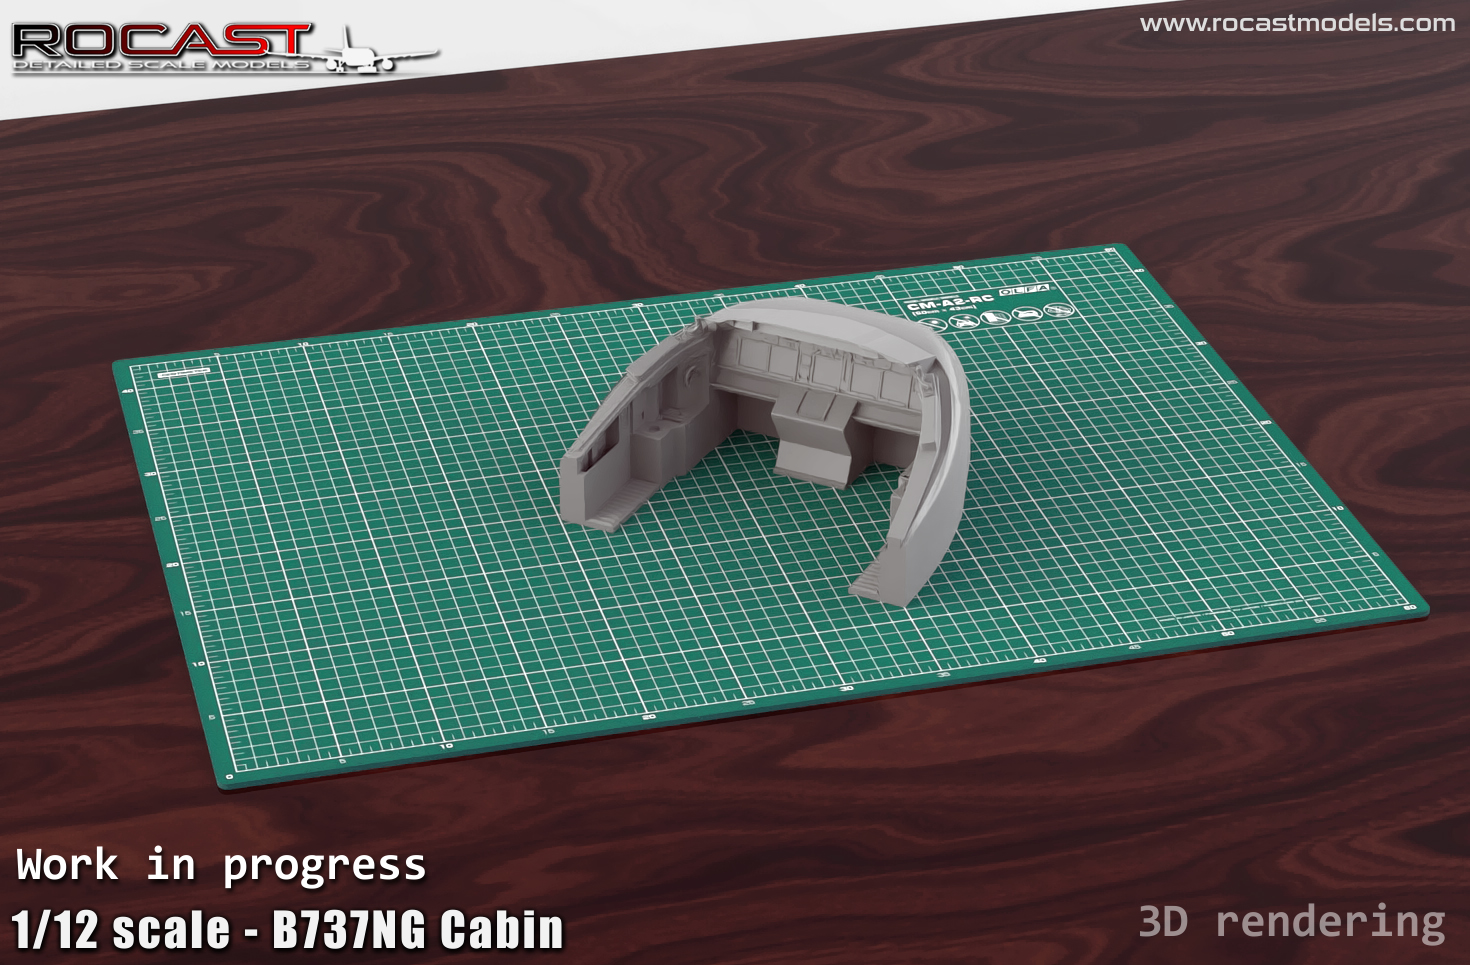
So in a way, I would like to leave the outer skin of the aircraft covering the sidewalls and behind the glareshield, this also gives options to paint this area in colors of the desired airline.
At first I do plan to make the aft bulkhead area with the cockpit door, circuit breakers etc, this would serve as a back support to connect the overhead panel, which will hold at the FWD by the center pillar.
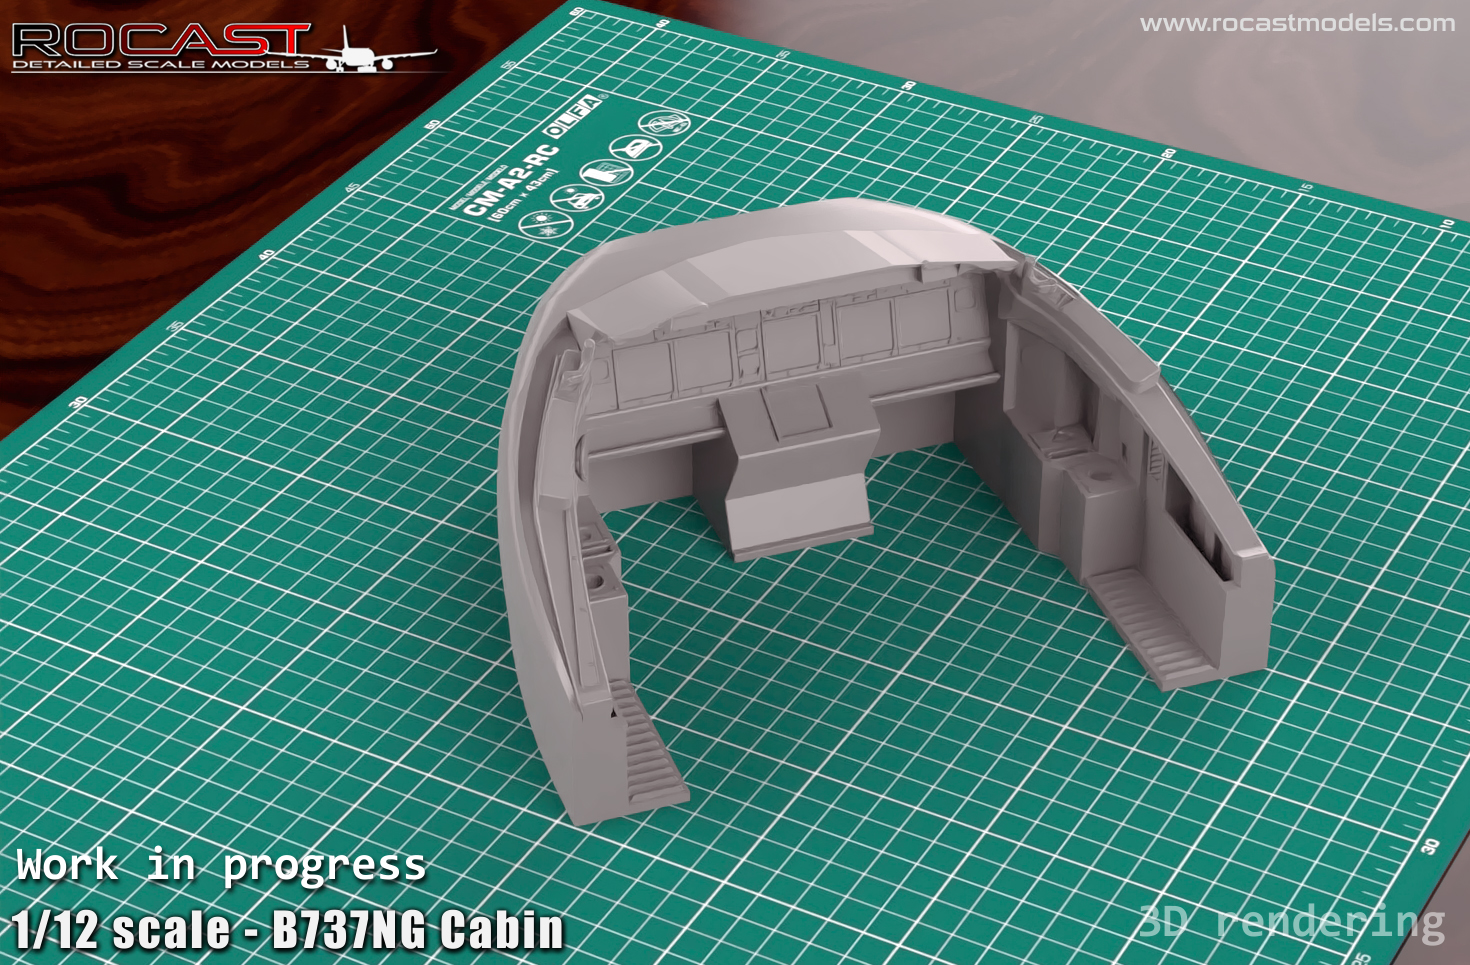
The cut at the nose leaves a nice area for an engraved plate, which is something I may offer as an option, I think it would be the perfect customization for any pilot.
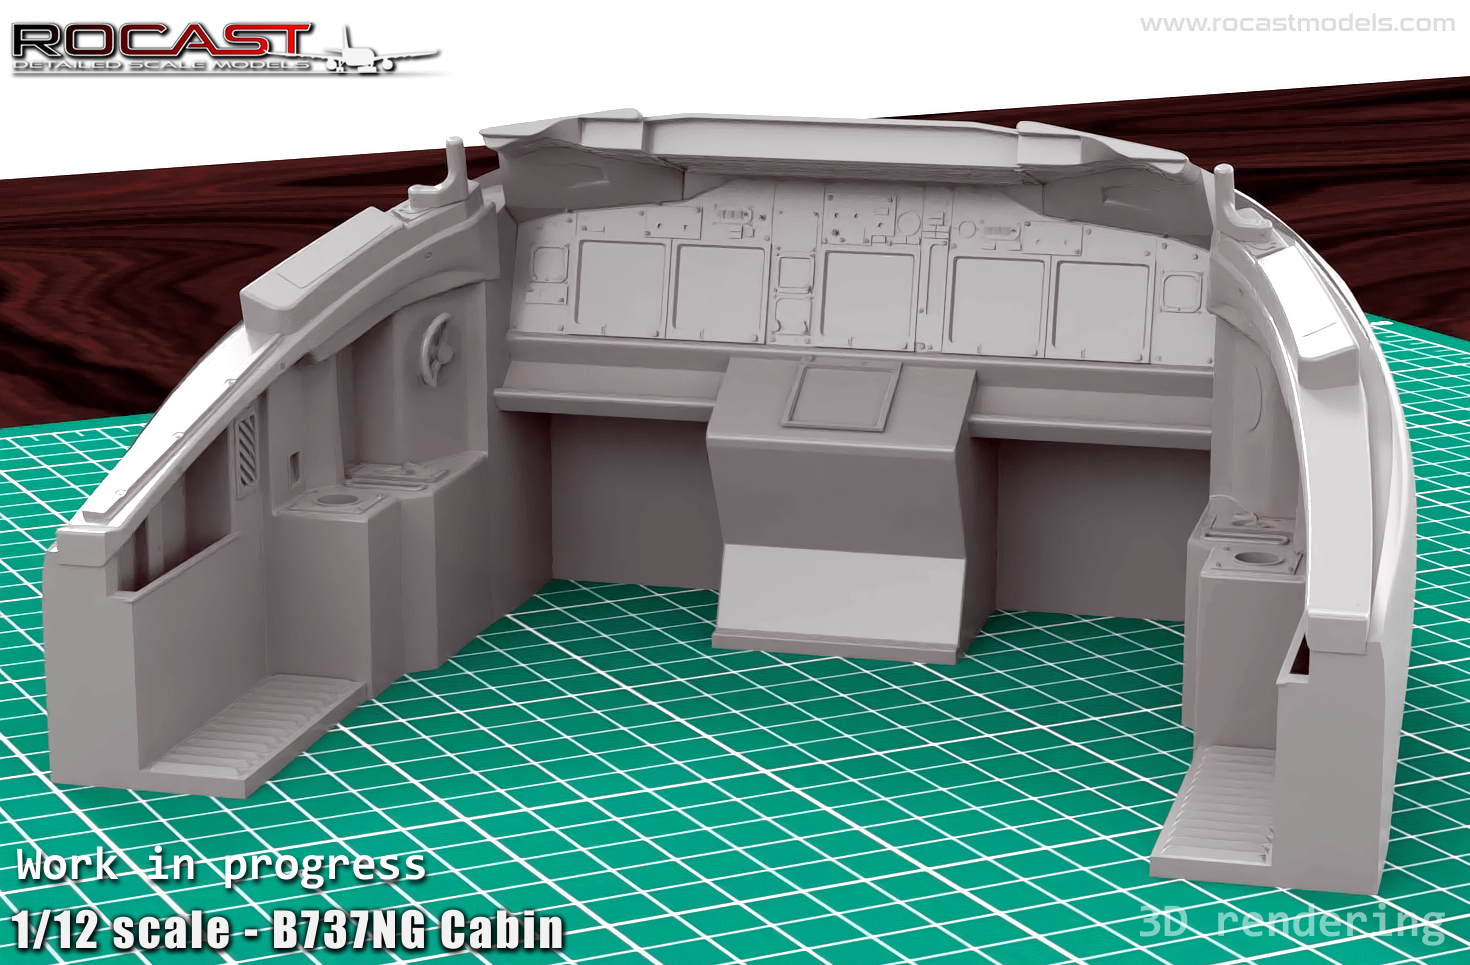
Although I present a basic general shape, some things are a bit complex to do so I may do some modifications later on to the master part smoothing out transitions.
Lighting:
I have been considering the lighting, however, this puts the project in a whole other level of difficulty. The switches and buttons on the real cockpit do have backlight for their correspondent letters, so even working on 1/12 scale, some things remain quite small still. I thought of making a transparent panel and add masks to cover the areas where the light will be, but I also must consider the build process for the modeler and also the costs.
Making the AFT bulkhead, I will be able to install the dome lights which are present in the real aircraft, so these will already light up the cockpit front. I still need to consider the lighting for the panels, it would certainly be “cool” but unlike the real deal, it won’t be used at night, I imagine this project as something to exhibit on a desk, maybe on a round base using a round acrylic tube as a showcase.
B747-8F:
This project is still in the fuselage stage, I am discovering new methods to light up the interior, something that I saw recently are the LED neon cables. The method is still the same, run the cable through the designated trench, cover the areas of the LED with putty leaving it visible only on the light ports.
This is a project I am very excited to continue with, however, I know of its magnitude and I want to move forward once I have things settled; the time spent reorganizing my workplace has also prevented me from restocking several items, so there are things that need to be done first.
B787:
I recently resumed the work on my 787 build on the weekends, however, while doing this, I got a couple ideas that I am going to implement. This will be explained on another update, but I can say that there will be three fuselages for all the variants, so cutting of it will not be necessary, this will also lead me to work on the -10 version.
I will try to make this product more straight forward to build, with some changes in the assembly that I would like to use as a standard practice on future projects, this will make things better for production and better for the assembly process.
I aim to release the third batch by Christmas time, so I will do my best to push this forward. I will be sharing more about this on my next update.
That is all for now, I have been absent but I have been working a lot on my workplace, at times I feel like doing steps back, but sometimes you need to do so to move forward with more ease, organization, health and even to have things and projects done more readily.
Thank you all for your patience on some of the projects you may be awaiting, I keep working on them all.
Best wishes,
Guillem